
DIY Record Player Stand: $10 Chair Upcycle
I found a thrifted chair for $10 and turned it into a funky mid-century modern record player stand with vinyl storage. Here’s how you can do it too:

Material List
Thrifted chrome chair frame ($10)
Walnut plywood (for boxes)
3/4” Rough Walnut Slab (for armrests)
Wood glue
Brad nails
Walnut edge banding
Steel rods (⅛”, for vinyl dividers)
1/4” - 2 ½” lag bolts, nuts, washers
Bar Keeper’s Friend (for cleaning chrome)
OFF (Remove Rust Stains)
Rubio Monocoat (wood oil)
Furniture pads (for leveling/support)
Tool List
Plunge saw (for straight + angled cuts) (alternatives: circular saw, table saw)
Drill + drill bits
Clamps + cauls
Edge banding trimmer
Iron (for edge banding)
Cut-off tool (for steel rods)
Table Saw + Planer (for walnut armrests)
Measuring tape + square
220 Grit Sandpaper
Shop this episode!


Step 1: Start with the Vision
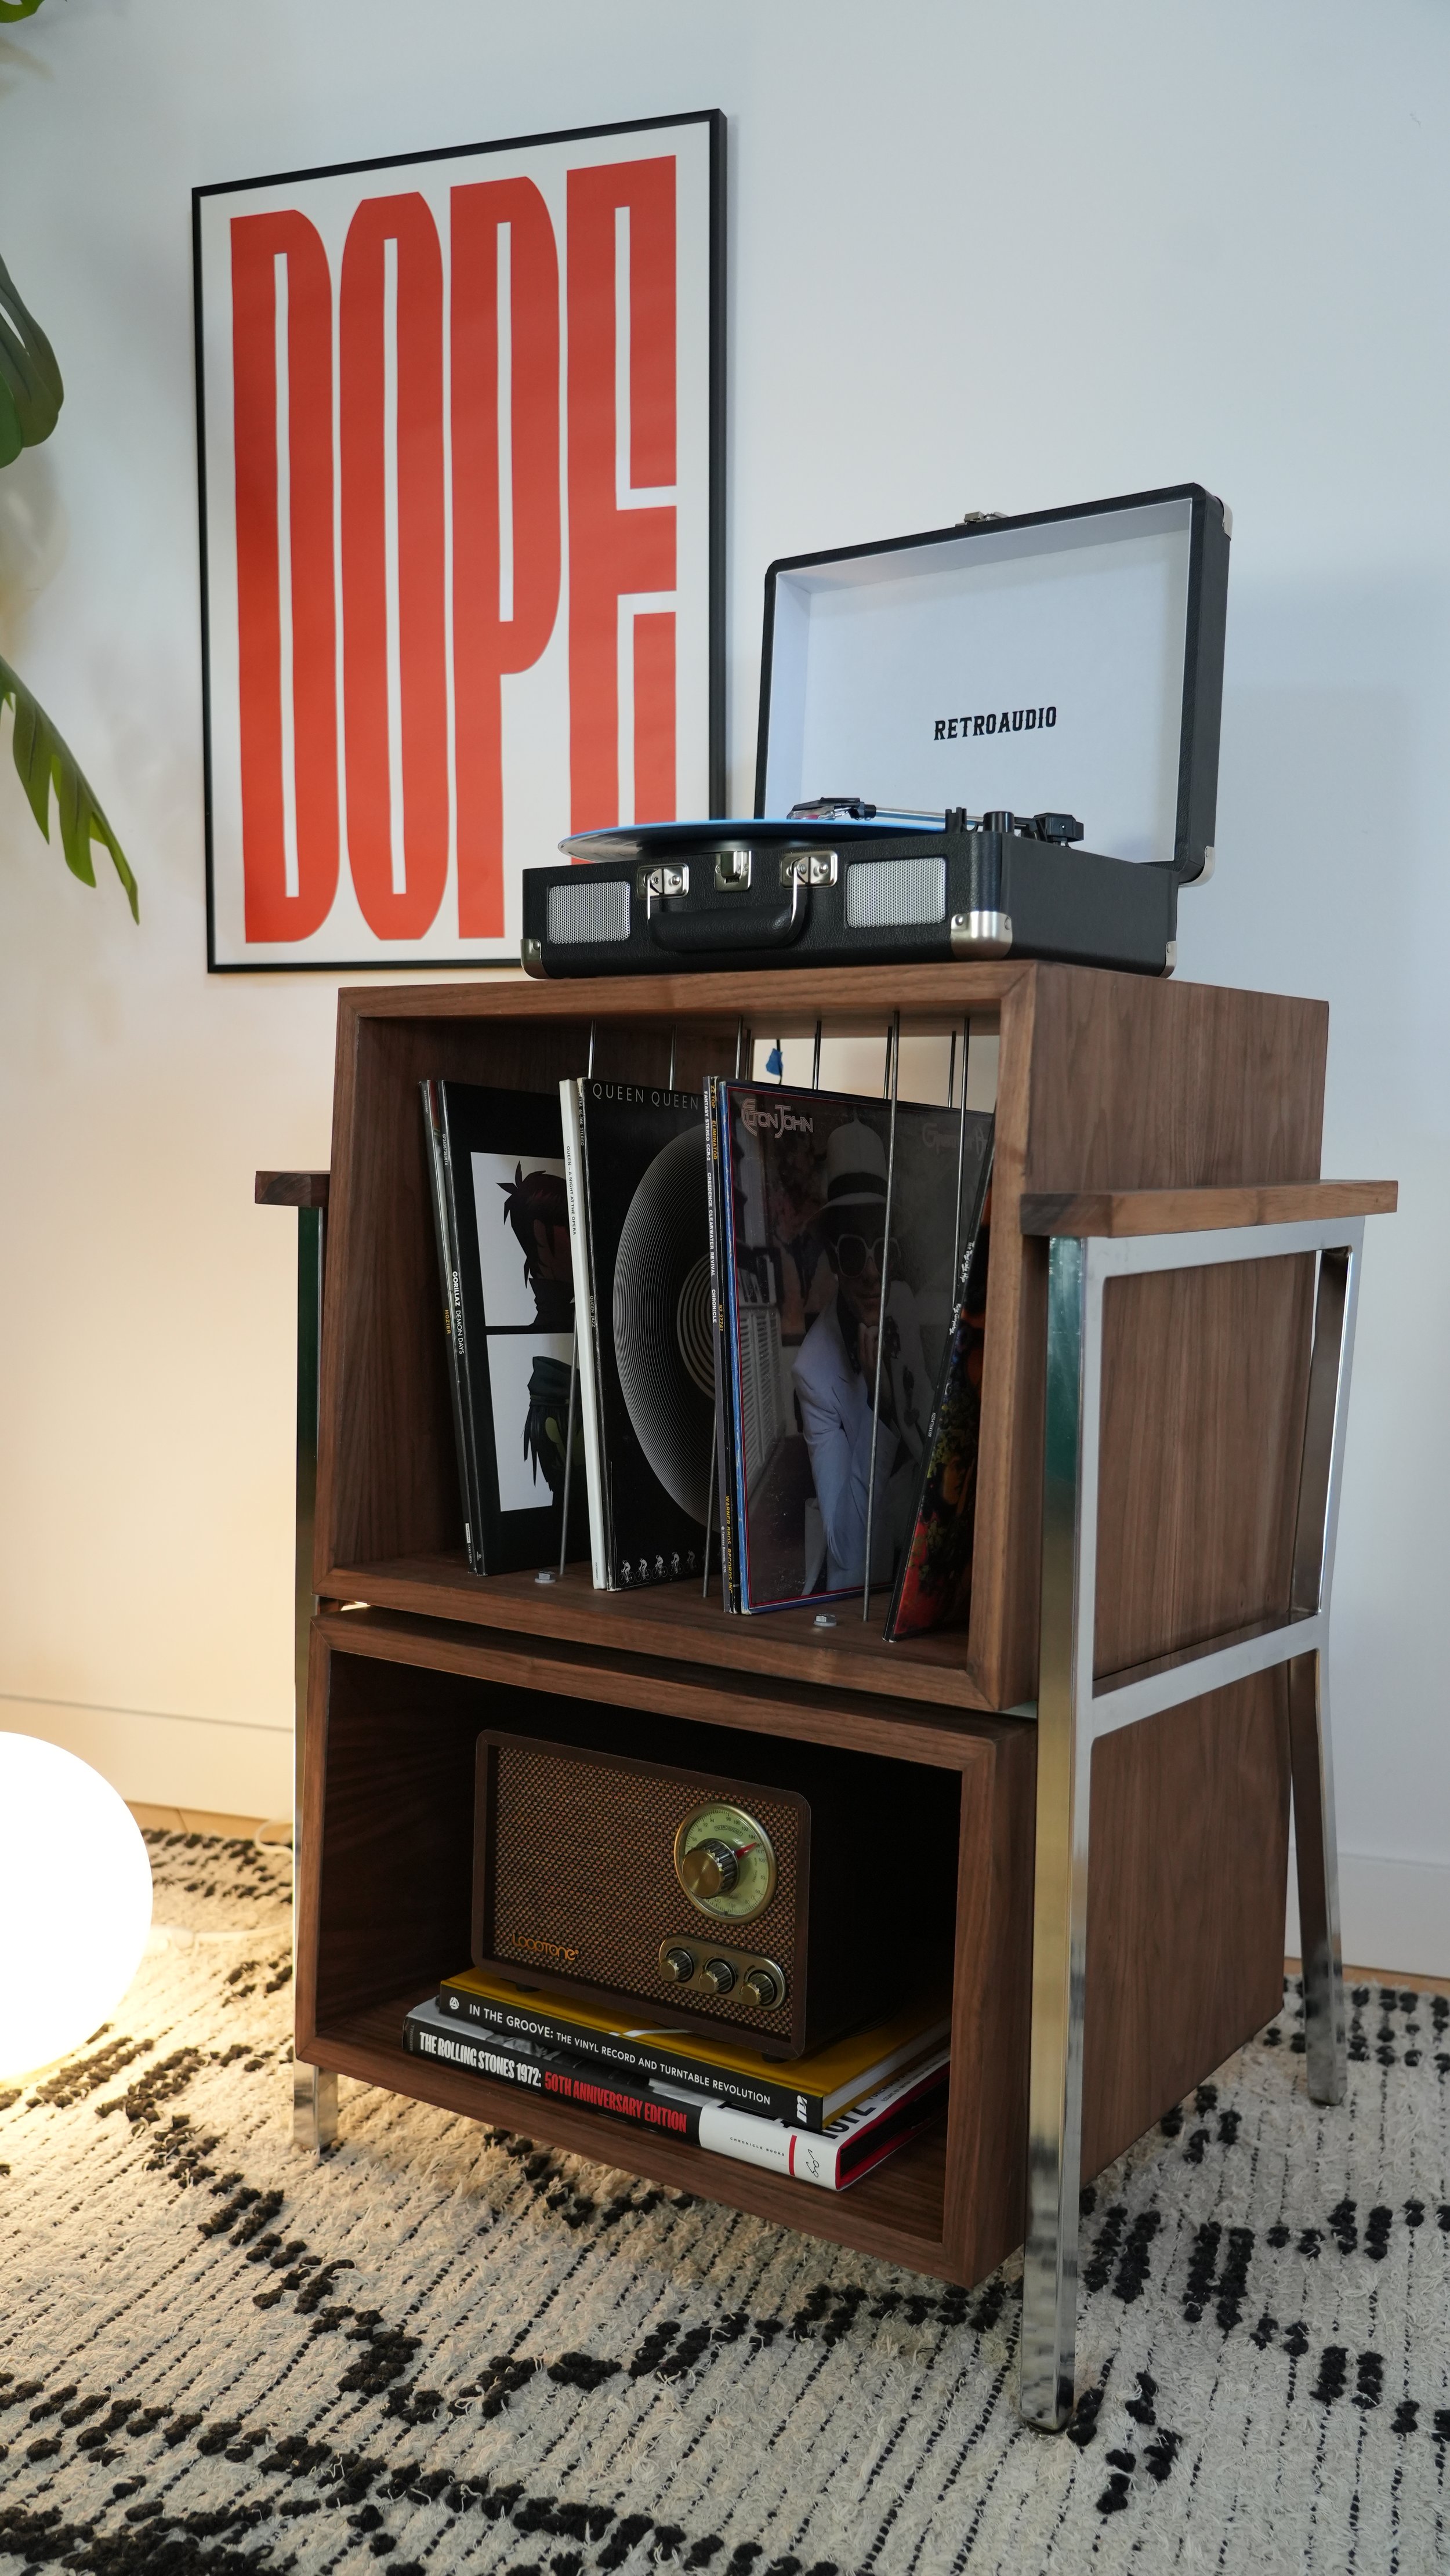
Take apart the chair and keep the chrome frame.
Build two wooden boxes to act as the record storage:
Top box = Vinyl Storage
Bottom box = Storage
In this specific situation, the chair frame was angled. The boxes needed to compensate for this angle, meaning the construction was built into two trapezoid shapes instead of squares, which effects the type of math and cuts you make!
👉 Tip: Use cardboard or foam board mockups before cutting wood. It saves money and catches design flaws early!


Step 2: Geometry & Planning
The wood boxes needed to compensate for slope of the chair:
Bottom box = 1 ⅛” taller in front
Top box = 1 ¼” taller in back
Step 3: Cut the Plywood
For this project, I splurged on walnut plywood (worth it!).
I used a plunge saw to cut nine pieces.
All edges were cut at 45° miters.


Step 4: Assemble Boxes
This was a simple build - only wood glue + nails (no fancy joinery).
Once all the pieces for the boxes are cut, assemble them together!


Step 5: Edge Banding
I covered plywood edges with walnut banding.
Use an iron and trim the excess with an edge trimmer.
It was time-consuming but gave a polished, pro finish.

Step 6: Walnut Armrests
I cut and planed a solid 3/4” piece of walnut to replace the original armrests.
Then I oiled to reveal the beautiful rich, natural grain.
I predrilled holes into the wood and then screwed the boxes into the chrome frame.


Step 7: Clean the Frame
The chrome frame in the chair that I purchased had rust.
I scrubbed with Bar Keeper’s Friend and it removed 80% of the rust and grime!
I finished with a good layer of “OFF” to remove the rest.


Step 8: Attach the Boxes
I positioned boxes on the frame and marked the screw holes from underneath.
I drilled a small pilot hole at the positioned marks from the bottom
I stacked both boxes flush, then from the inside, screwed through box boxes using a 1/4” drill bit (same size as my lag bolts)
NOTE: clamp the boxes so they dont shift and add a caul on the bottom to avoid any blowout from the drill bit.
I positioned my boxes in place on the frame and Sandwiched them tight to the frame using 2 ½” lag bolts + washers.


Step 9: Add Vinyl Dividers
I used ⅛” steel rods as dividers for the top box.
I drilled small 1/2” holes on the top, and made small divots on the bottom for the steel rods to sit inside.
The result created neat, minimal storage rows for records.


Step 10: Finish & Style
I made sure to oil the plywood which made the wood grain and colour of the walnut shineeeeee.
I added a record player, stacked vinyls, and styled decor in bottom cubby to bring this piece together!


And that’s it, DIY friends! From a $10 thrifted chair destined for the dump to a one-of-a-kind mid-century modern record player stand with vinyl storage—this flip proves that with a little creativity (and some brain-bending geometry), you can totally funk up even the most unexpected pieces.