
Industrial Live Edge Table W/ Ombré Epoxy Channels!
Working with live edge was nothing new for me in the DIY space. I've created many live edge coffee tables in the past, with great success may I add! However, working with live edge that still contained the bark AND featured an epoxy resin component to it? well, this was a whole new ballgame ⚾. Was I nervous? ok, a little... but my appetite for new challenges far outweighed my fear of something new, so I was ready to jump in with both feet.
This was a moment of DIY DO IT...plus, how hard could it be? 🤷♀️
This project was part 2 of 3 in my DIY Office Makeover with Fusion Mineral Paint owner, Jennylyn. The first project I tackled was the colorful Ombré Radiator. For part 2, Jennylyn wanted to create a meeting desk for the middle of her office space. This was a place where she could sit down with clients to discuss paint colors and business. She was excited about the idea of a live edge table that could feature her paints in some artistic way. Needless to say, I was excited and thus my DIY Industrial Live Edge Table with Ombé Epoxy Channels was born! 🎇
THE DIARY,
Working with epoxy resin has been on my DIY bucket list for a long time. I think I've watched every epoxy resin table DIY on the internet and thought - "I could do that!" Although, I’m not going to lie ... something about epoxy intimidated me. I'm not sure if it was the sheer science behind it or the fact that all the videos I watched online was made by expert carpenters who knew what they were doing. It looked like fun, but the process was really unknown to me.
Of course, I knew better than anyone that you just need to start somewhere and I figured if you're going to try it, try it on something EPIC.
WOOD TYPE: MAPLE LIVE EDGE SLAB -- 2 1/8" thick, 6ft long, 20 - 22" wide.

This maple slab was beautiful. 😍 It had all the bark intact and had so much character with all the knots and holes. I had never worked with maple wood before but based on first impressions, I knew I was going to have a beautiful board at the end of it all.
The little things I didn't take into account when I got this board: the cupping and twist due to moisture and weathering. Basically, I had a lot of work ahead of me and I really had no idea what was coming...
Once I saw the board, my goal was to brainstorm different ideas on how I could incorporate the fusion mineral paint into the epoxy that will be used on the board. Not getting too advanced for my skill set, I pitched some really cool ideas - which one is your favorite?
OPTION 1: REAL PAINT-DIPPED BRUSHES IN A CLEAR EPOXY CHANNEL

OPTION 2: OMBRE COLOR TRANSITION EPOXY CHANNEL

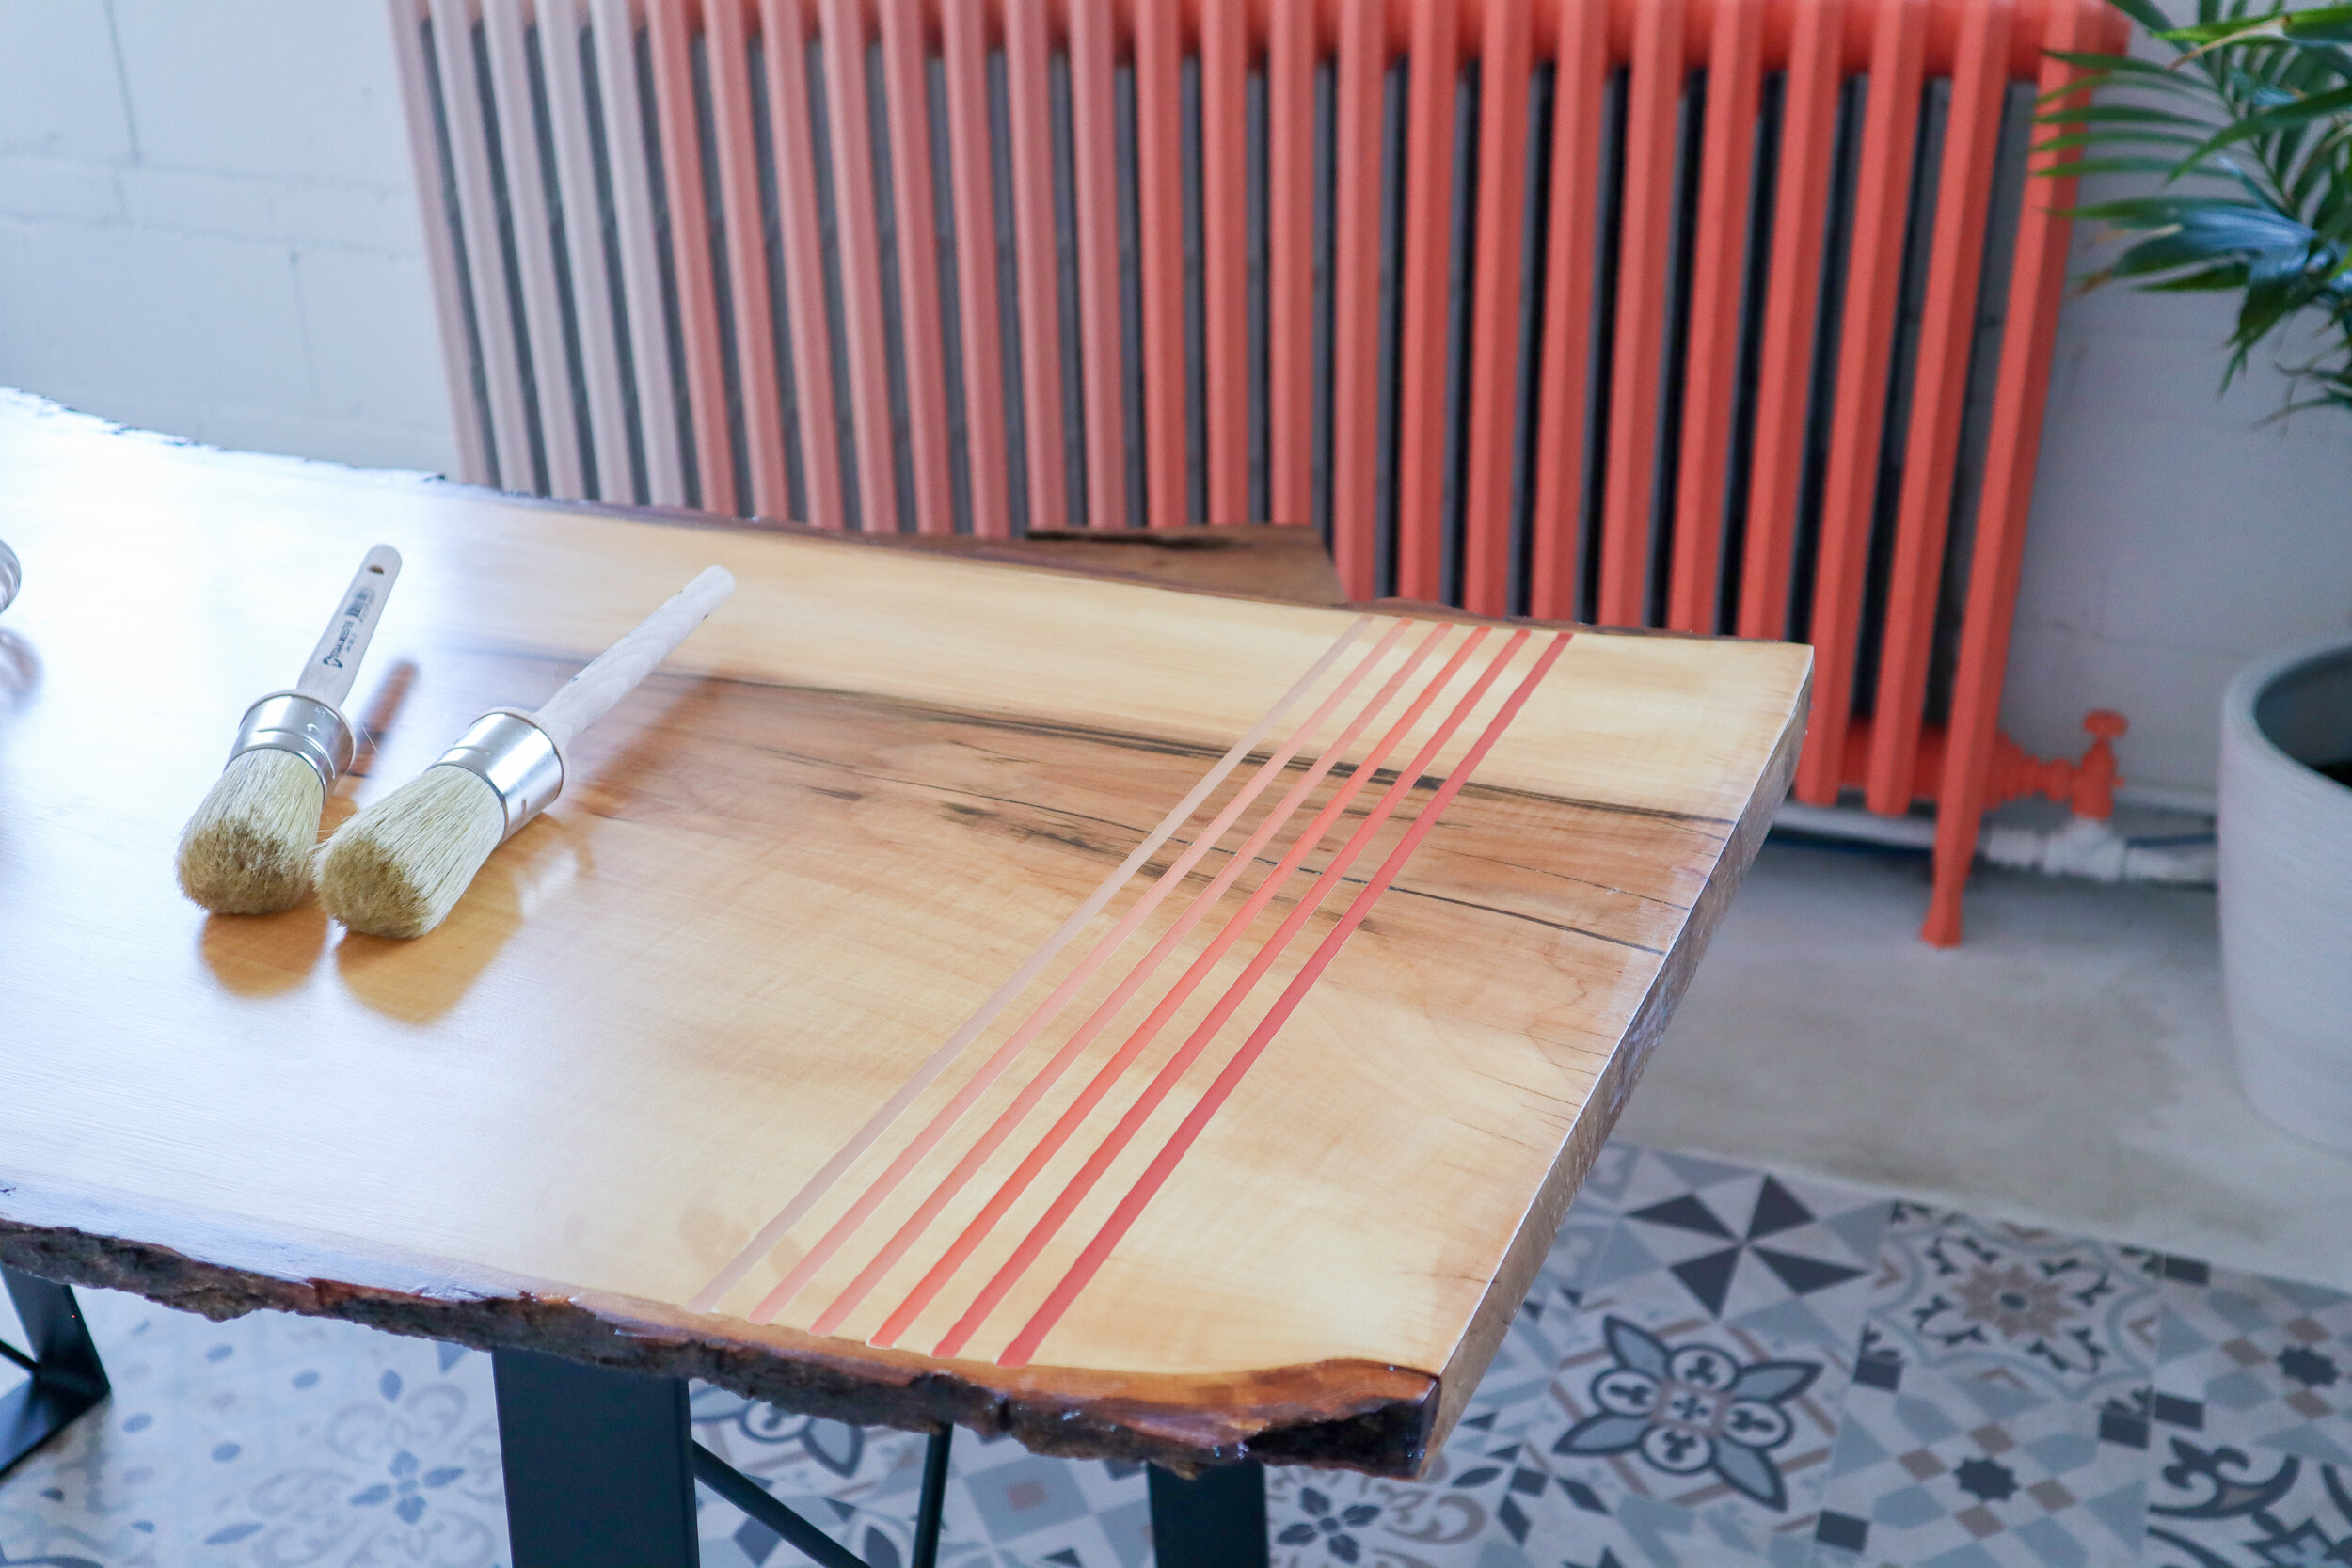
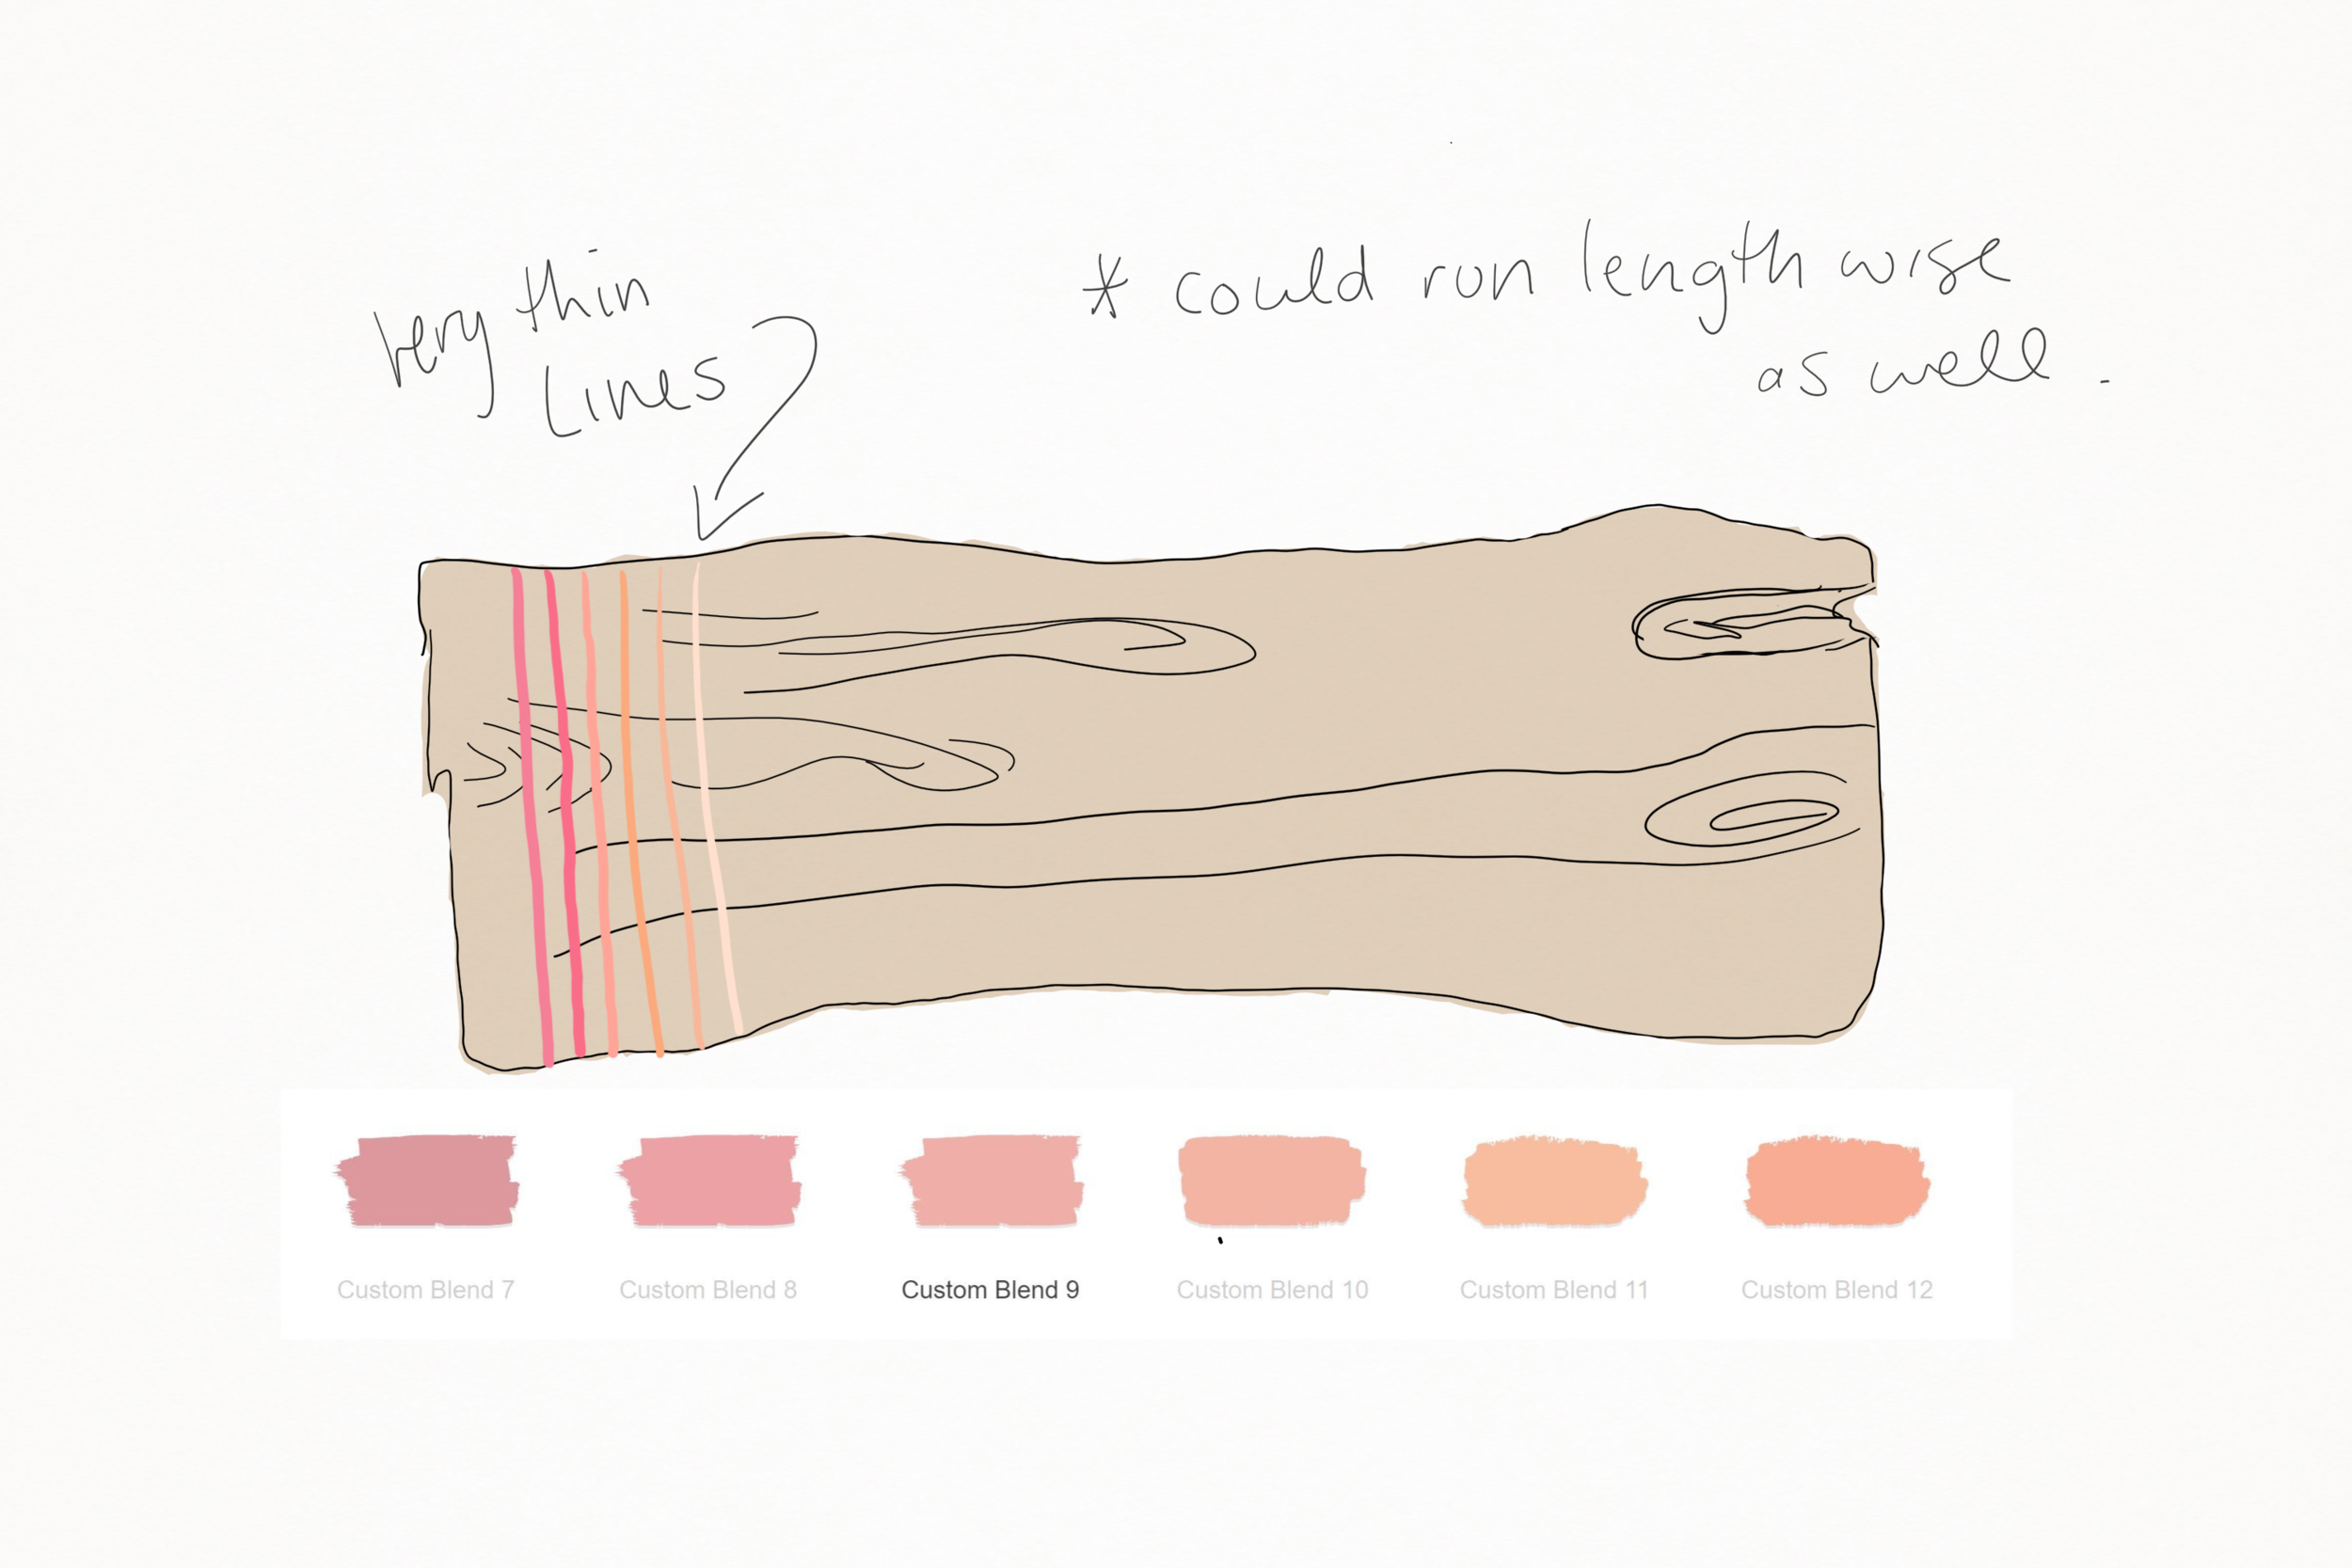
OPTION 3: THIN OMBRE LINES DOWN THE LEFT SIDE OF BOARD (OR ACROSS)
OPTION 4: FUSION PAINT EPOXY COLOR PALETTE

THE WINNER: OPTION 3!
TESTING EPOXY: Due to my lack of experience with epoxy, it was important that I test my idea properly before applying it on my final project. I had done some research online and many creators who were big on epoxy paint pouring said you can mix paint with epoxy, as long as it has an acrylic base. Lucky for me, fusion mineral paint was acrylic based.
Here is what I learned:
ONE: If you are going to mix acrylic paint with epoxy… you need to add the paint in your cup first (you don't need a lot), then add your part A. Mix these really well before adding your part b hardener. For some reason, if you don't do it in this order, you’ll end up getting white specs in your mix. Follow your epoxy kit directions for proper mixing protocol.

TWO: You should never mix acrylic paint with epoxy. I tried mixing acrylic with epoxy over 4 different times, each time the result was sticky and spongy. Apparently, this is normal if the epoxy doesn’t mix properly with the hardener. I was really discouraged at that point, so I decided to go visit a local expert in epoxy resin pouring and basically I learned that you should never mix acrylic (or anything for that matter) with epoxy unless you’re using a tint or mineral powder. Anything else, will cause it to become sticky.

Mica Powder

Tints
The real lesson learned was, you CAN mix acrylic paint with epoxy if you're performing a paint pour on a canvas, where the end result of the canvas doesn't need to be rock hard. If you need a hard finish like me, then stick to using a tint or mineral.
Keep in mind, I only tested this theory with 1 brand of epoxy which was an eco epoxy brand. I don't know the difference between an eco and regular epoxy, so I would like to test this "acrylic" theory with another epoxy kit in the future, just to ensure these accusations are true. Stay tuned!
With all seriousness though, I really wanted to incorporate the fusion paint colors onto the board, so my epoxy expert and I came up with a new plan. He mentioned lining each channel with a product called Gesso, then paint the mineral paint on top and finish with a simple clear epoxy pour inside. Seemed pretty easy to me!
What is gesso? gesso is essentially a thick white substance that artists apply on their canvas before painting with acrylics so that the paint doesn’t absorb into their canvas… it’s basically like a primer...but on a canvas! I also liked that it was white, essentially helping to make the acrylic colors pop more in the channels.
Two other big notes to mention is dry time and room conditions. Between each layer, you should provide a dry time of 24 hours (or more) to ensure there is no moisture stuck inside and make sure your board is in a dry environment to ensure each layer dry's properly.
After all new testing was done, I started to see success!

At that point, I was on my way to spend a week at my moms, which was the perfect time to work on the body of the table because there I had access to entire wood shop and TEAM ITALIAN...who I also like to call TEAM SUPER MARIO BROS. 😎 WHHA HOOO!!!!

Team Italian consisted of my Step-Father Vince and his brother Gino. They've both been wood working their entire lives and were able to provide me with guidance and advice in my struggles over the next few days.
THE BOARD:
Once I had a chance to really evaluate my board, I realized I was faced with some challenges. First, my board was cupped which happens to many boards when it’s been exposed to exterior elements and didn’t dry uniformly on both sides. Second, I had a twist at the long, tapered end of my board - which basically meant I was screwed.
First step, was to take out the cupping in the board. To start, I evaluated how much of the board I needed to remove to make it level while also keeping it at a reasonable thickness.

To remove the cupping, I started with a tool called a PLANER.

I set my planer between 1/16th + 1/8th. As I started planning, that's when we realized the twist at the end of the board was far worse than we thought, and there was no way we could get a flat surface of any reasonable thickness, so had to cut off the twisted end which resulted in removing close to 18” from the board. With this portion removed, the table was left at 54”, which was a good size for a desk.
PLANER TIP: The planer will drop off when you reach the edge of your board. If you don't keep your planer straight as you slide it off, it will gouge the edge of your board.
With the worst part of the twist gone, this allowed me to keep planing the board into a reasonable thickness. Which ended up being 1 ½ inches.


At the end of each day, we would clamp the board flat to the work table at both raised corners. Since so much wood was taken away , the board finally had a chance to breathe. A really cool trick I learned to help re-correct the warp was to poured water in the middle of it and leave it for 24 hours. The dampness on the newly planed board can help reset the wood to correct it.

24 HOURS LATER….
The board sat for 24 hours clamped + it was wet again the second night. By wetting it and clamps, it properly helps take out the twist.
We unclamped the board and the twist was not as bad as it use to be! Things were looking up!
At this point, we evaluated which side of the board we wanted to be the top because it was apparent that if we leveled out both sides, we would be left with a board that was ½” thich which is not thick enough for a desk. So we used the more cupped side because it was really the path of least resistance.
To remove the cupped warp, we used something called a "SLED" - which is made up of two pieces of wood that basically sandwhich your board with a box guide that slides on top. The box has a hole built into it to allow a router to comfortably (and controllably) run back and forth across your board. The general idea is that you level off the two sandwiched boards so that when you begin to remove any material from your board, you're only removing the amount that needs to be removed to properly level it.
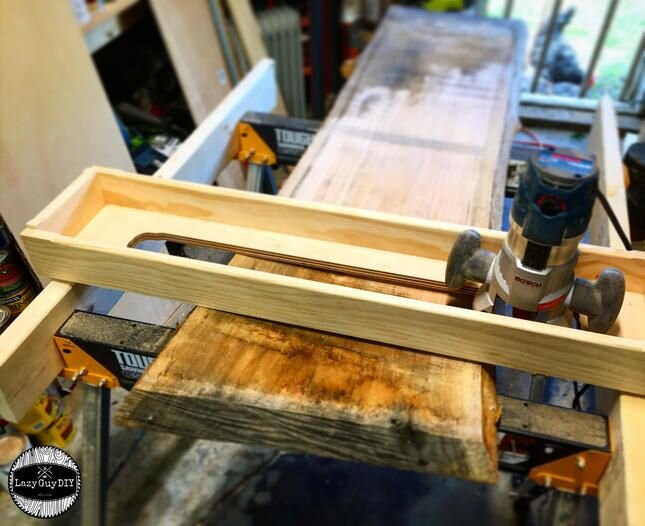

Using a ¾” router bit that dipped 1/8th of inch down, I used the box guide to remove the board ⅛” at a time. I did about 3 passes on the board before it was level. You know when you are done when your router bit has touched the entire surface.
After the board was level, we took a 36 and a 50 grit sandpaper on a belt sander to remove the deep grooves in the board. Basically just removed any ridges from the router.
SANDING TIP: If you want to see any areas or grooves that still need to be removed on your board, turn off the lights and use a flashlight to shine across the board. You’ll begin to see areas that you can't see in the normal light that still need to be sanded. Kinda cool right? Basically, the flash light reveals hidden ridges and imperfections you don't see! Sanding Detective!
ROUTING THE CHANNELS:
This part was probably the most nerve wrecking portion of this DIY. NAIL BITER!!!! I mean... If this goes badly, there wasn't anything I could do to fix it. I had to ensure all elements were set up properly to make this part go smoothly.
To create the channels, I used a 1/4" router bit on a small cordless plunge router. To ensure we created accurate and straight lines on the board, we found the center line of the board by measuring each end and taking the middle point, drawing a line down the center and used a square on this line to get an accurate 90 degree for the first channel groove.
To create a straight line, I used a straight edge (a scrape board) as my guide. Measuring from the edge of the router bit to the side of the router (1 3/4"), I placed a guide board down, 1 ¾“ from where I wanted the groove (this could change depending on your router).
To make sure the router didn’t jump away, we placed another board on the other side, the exact width of the router guide.

To ensure I didn't router through the live bark on the edges, I used clamps to stop the router guide from going too far. Better to be safe than sorry!

Once finished, I used a ⅝” board to draw the next line and moved my entire system forward + repeat.
Last, used a ¼” chisel to remove the rounded end from the router bit.

THE LEGS:
Attaching the legs was tricky. Since, I only ended up leveling off one side of the board, It meant I I needed to trace around the metal legs that I planned to use, and router only that section to save thickness of board, and time. To do this, I used a level + sled to determine a flat surface across.
Using a router and a 3/6” straight bit, I routed out a ¼” - ⅜” section across the board, depending on which side needed to be deeper. It almost felt like I was routering a ramp.

Depicts the grooves cut into the underside of the table top.
EPOXY CHANNELS:
First step, I added the gesso and did 2 layers using 24 hours of time in between each coat.
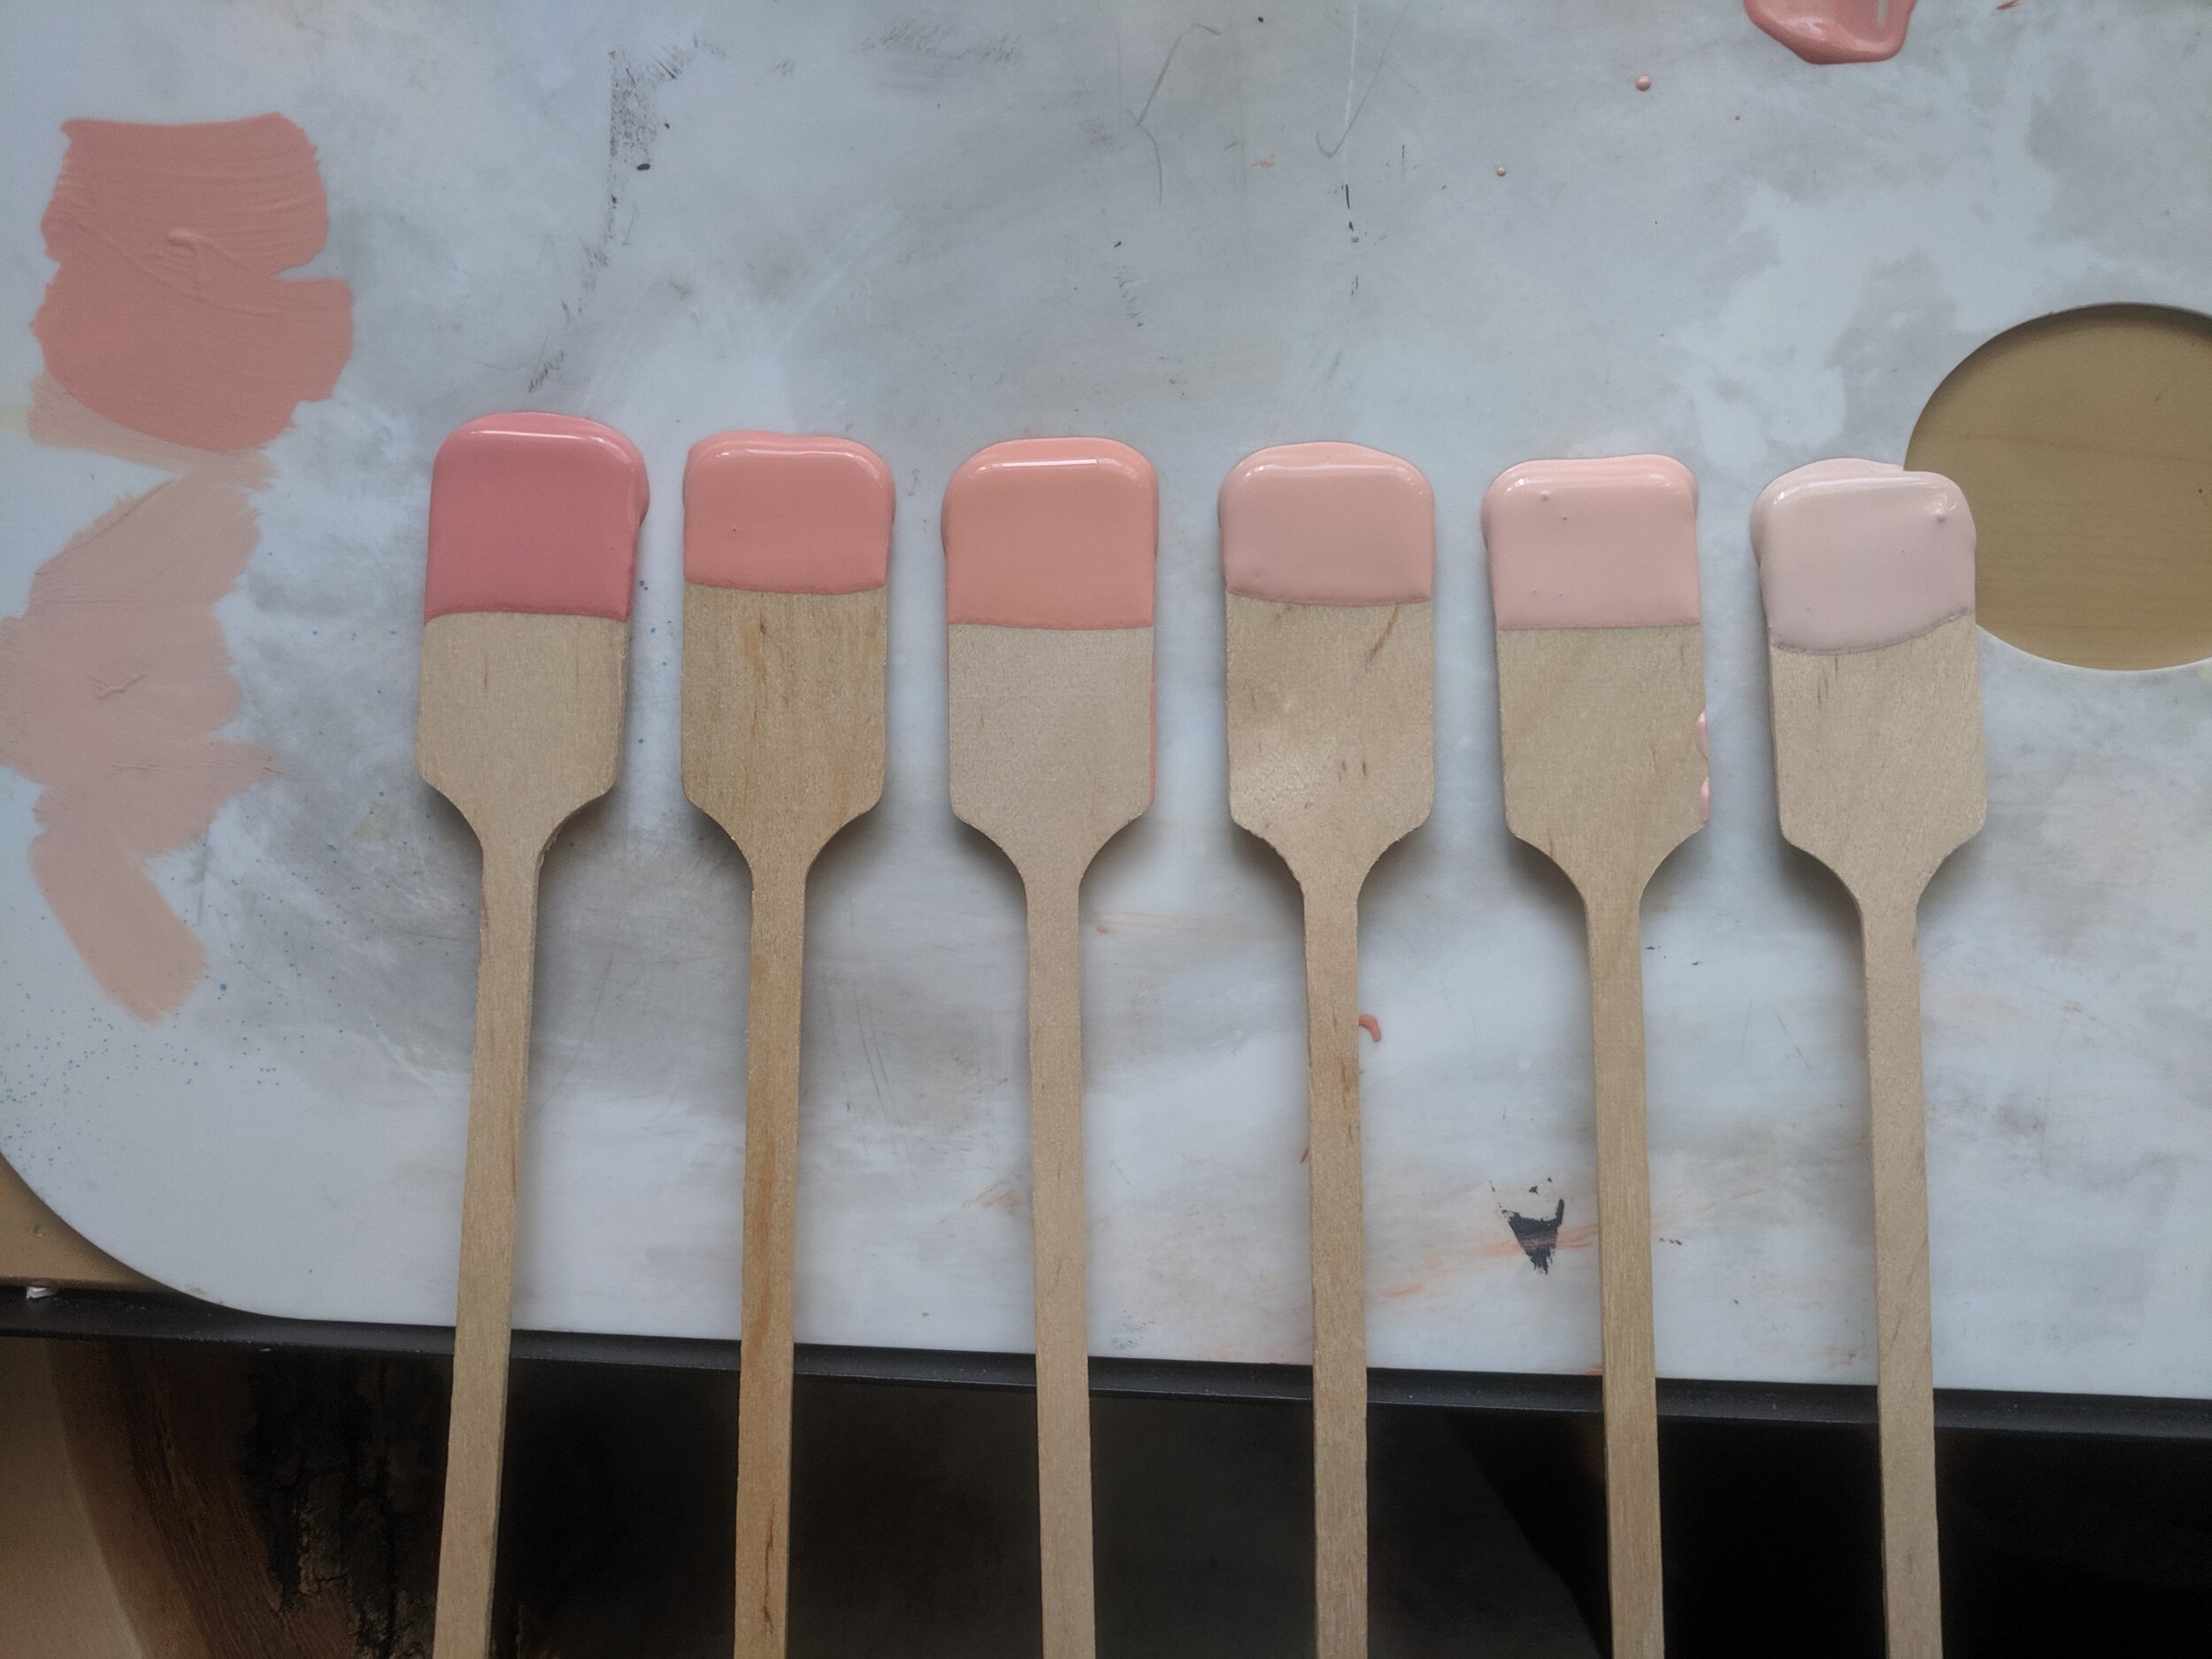
Acrylic - ombre colors. Picked 4 colors to make my 6 hues.
HUE 1: 3 Part Coral, 1 Part Fort York Red
HUE 2: 50% Hue 1, 5-% Hue 3
HUE 3: 3 Part Coral, 1 Part Enchanted Echinacea
HUE 4: 50% Part Hue 3, 50% Hue 5
HUE 5: 2 Part Coral, 2 Part Lamp White
HUE 6: 50% Part Hue 5, 50% Part Lamp White

EPOXY ROUND!😨
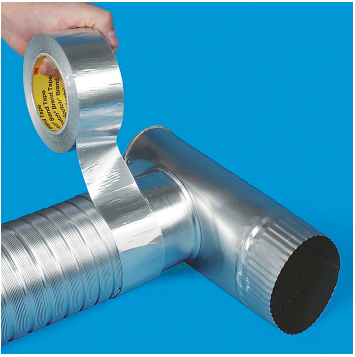
The first step to my Epoxy prep was to cover any cracks and edges on my board with Aluminum Foil tape. I had done some extensive searching online on the best tape to use, and most of my research led me to aluminum tape. It's normally used to protect parts and surfaces from chemicals, moisture, flame, heat and light. It's not cheap, but boy is it strong! Nothing was getting through those boards.

Next, I vacuumed away any dust off the board to make sure nothing was going to get caught in my epoxy.
After all the epoxy testing, I decided to change the brand I was using and go with a non-eco friendly version. Honestly, I wasn't trying to be eco-friendly from the start, it was just what I had, so I wanted to use it but I wasn't mucking around with my final piece - so I went with a trusted brand by Envirotex Lite - which you can find at any local crafting store.

Each epoxy kit comes with their own directions, so it's best to follow the directions for best results.
I was instructed to pour my Part A and Part B in a 50/50 mix and stir for 2 minutes. After 2 minutes, pour the mix into a new vessel and mix for another minute.
FEEL THE BURN FOLKS. My Arms were ON FIRE!
Pour epoxy and use a flat edge to spread it around.


Wait 15 minutes and use blow torch to remove air bubbles - keep it 6 inches away.

SANDING:
Once the epoxy had 48 hours to completely cure, it was ready to sand away. I threw some music on and just went at it. Working through the grits - I started with a 35 - 80 - 220 - 300 - 600. Once I got to the 600, that board was smooth as a babies bottom.

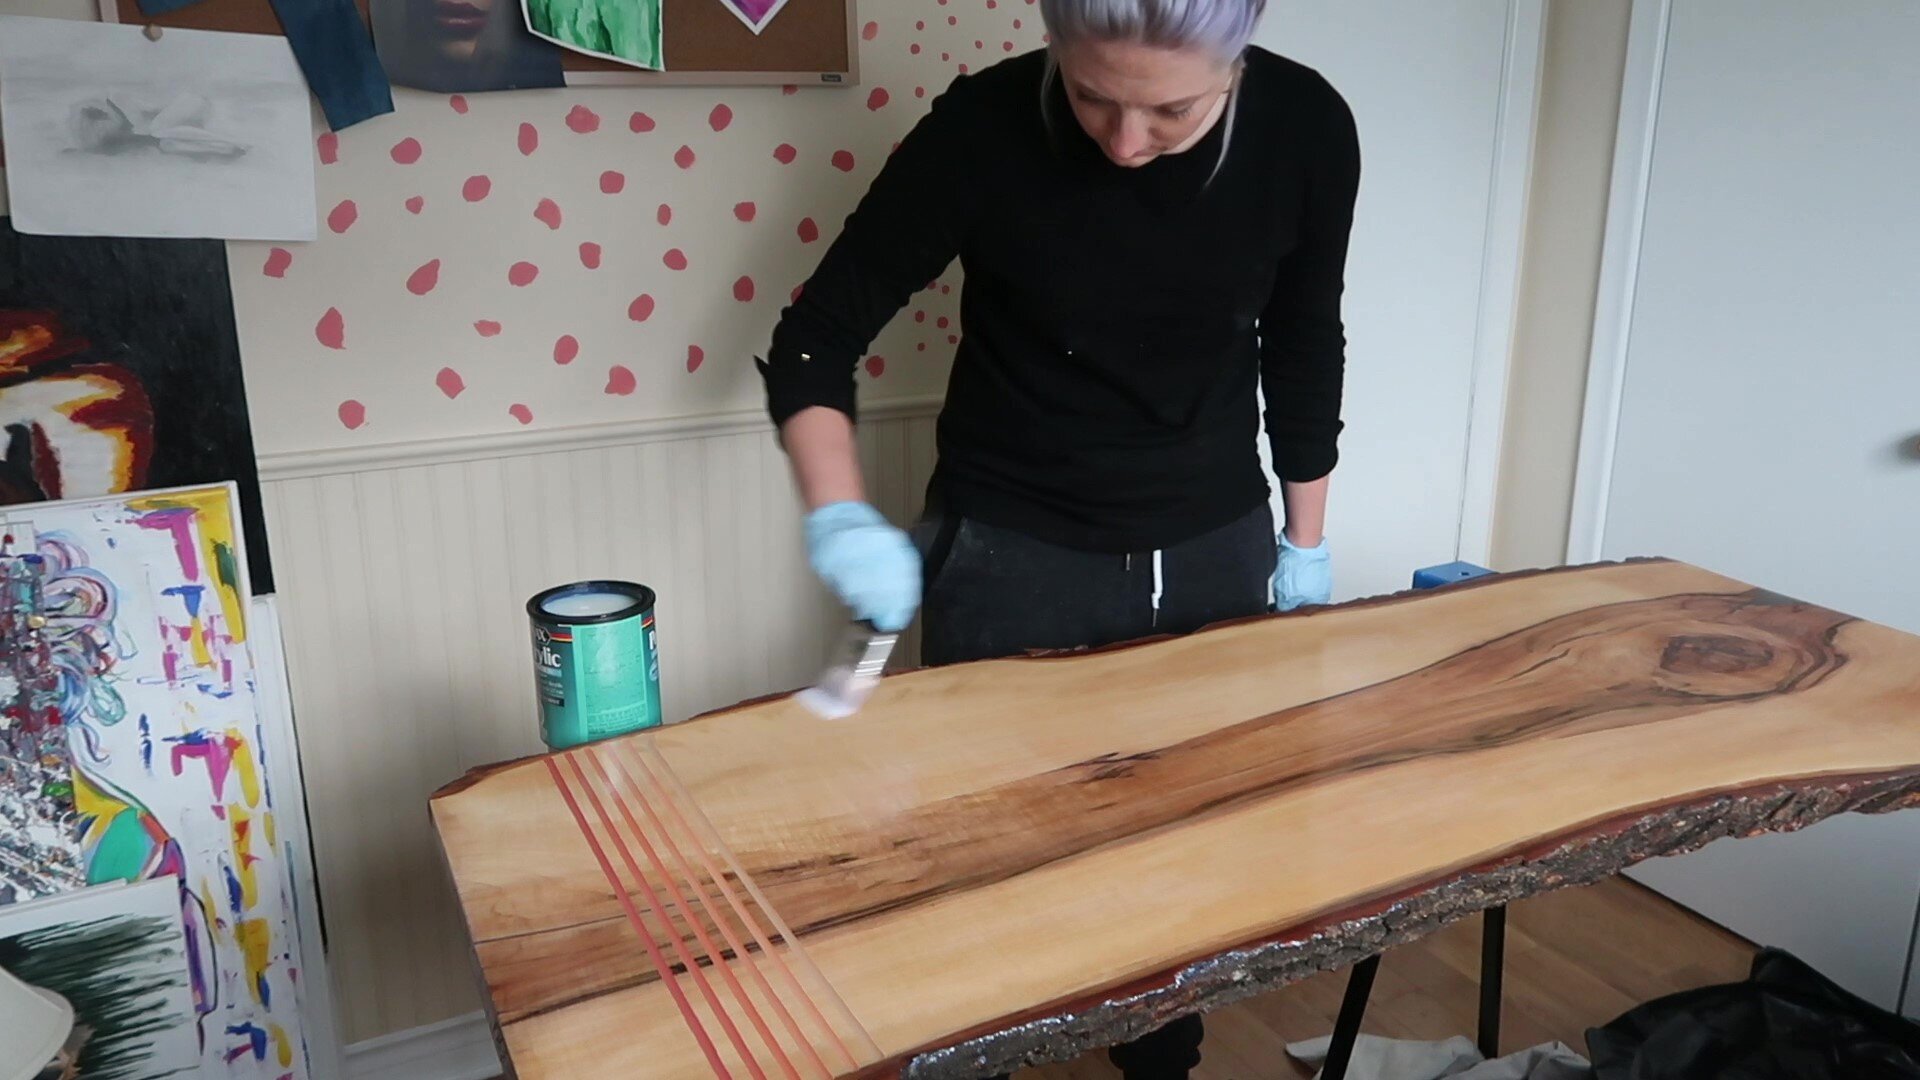
STAIN AND FINISH:
To clean it off, I used a brush and finished with a tack cloth.
To give the board a natural color, I coated it with omnia's live edge stain in natural. I went with this brand because I've used in the past and had great results with it. The natural tone provides a beautiful protection to my wood and makes its natural beauty shine through all while protecting it! It's a win/win really!

The oil is extremely durable and water won't penetrate the surface. I applied a thin coat, waited 10 minutes for the oil to penetrate and then wiped off with a cloth.
Another great alternative to omnia is Fusions Gel stain and Top coat - It's a one-step brush on stain and provides a tough protective coating giving it a durable, rich, satin finish – perfect for heavily used interior surfaces. It is ideal for areas that are washed frequently – table tops, bathroom vanities, even floors! This hard-wearing, maintenance-free interior finish enhances the beauty of natural wood while resisting water, food stains, alcohol, grease, and detergents.
I had the choice to just leave the omnia oil as my stain and top coat. Honestly, I thought about it but I wasn't convinced it would keep off any paint spills or general wear of everyday, knowing this was going to be a work desk. I did add a thin coat of polyurethane on top. Most people will argue that I didn't need this step but I was being extra careful to create a piece that would last the test of time. I also wanted to create a good seal for the live bark on the side and felt the polyurethane would do a better job of this vs the natural oil.

Now all that was left was to add the black square metal legs that I bought and get it into the space to surprise Jennylyn!

I used a dome shaped screw head to attach the legs but I didn’t like that they were silver, so i used an oil based sharpie paint pen and painted them in black to match.
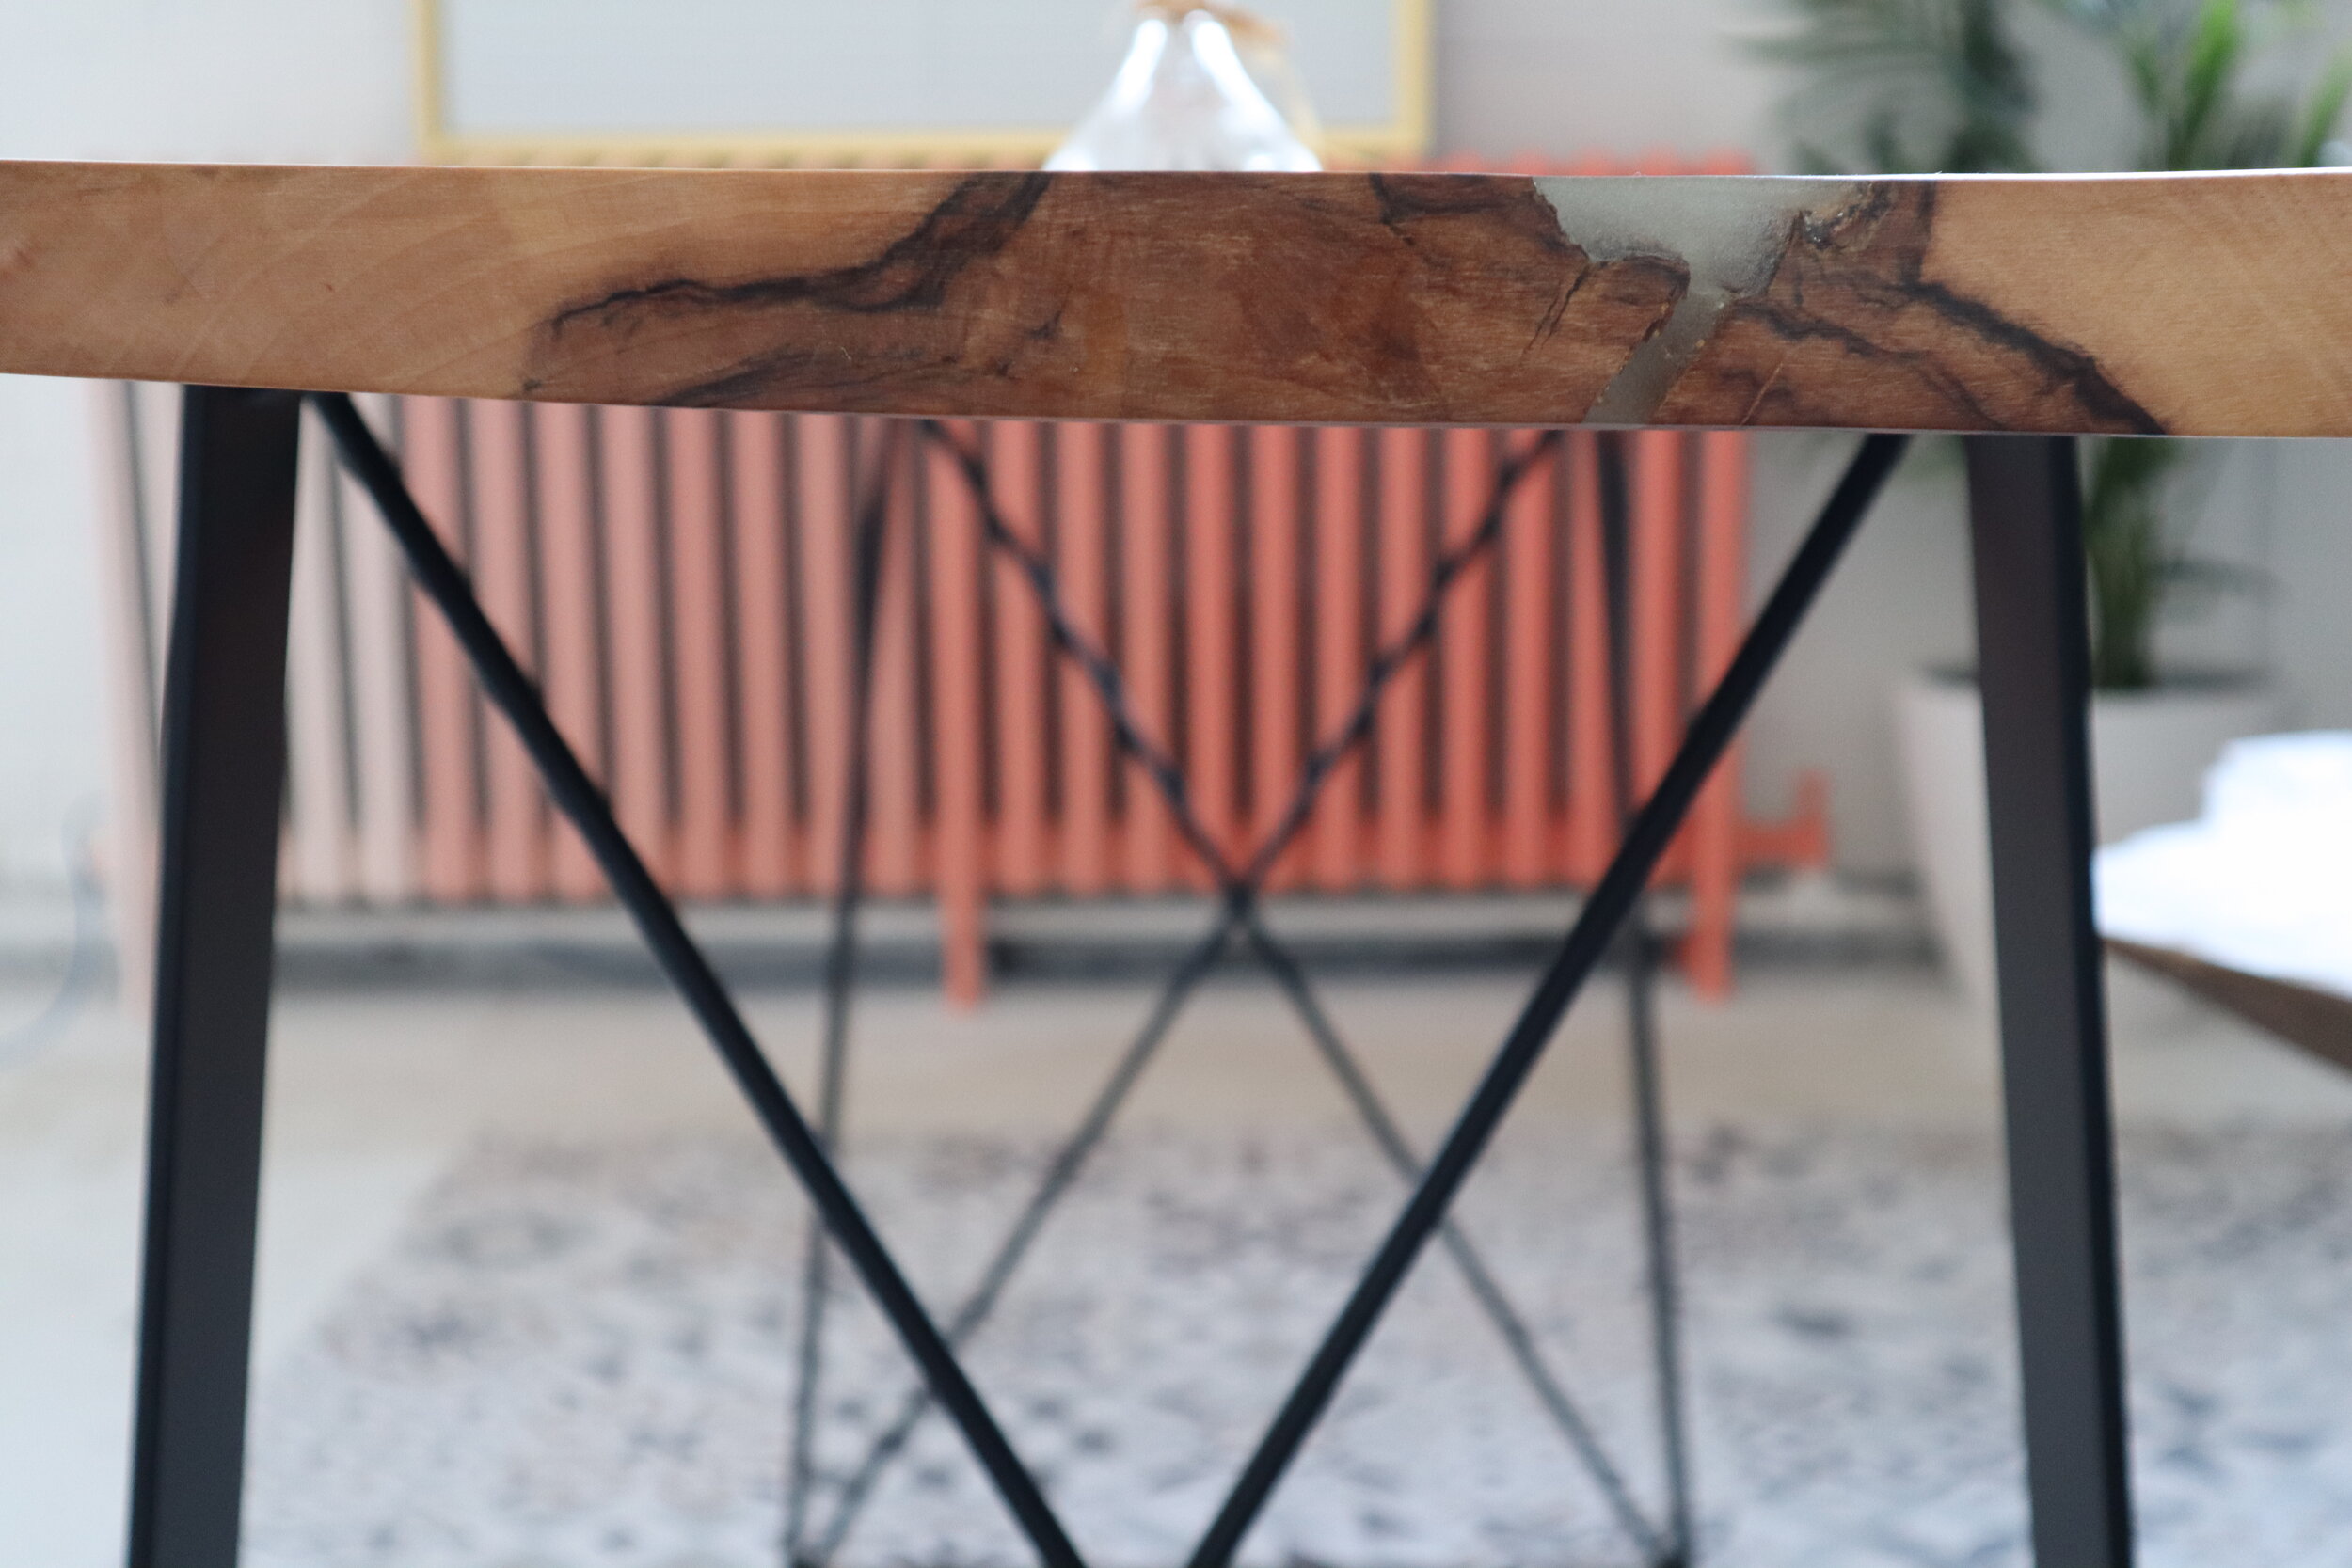
THE FINAL REVEAL!
The project was a huge success! Jennylyn was so happy and the table looked so friggin good in the space. 😍 I loved that Jennylyn already have a few live edge benches in the space so it created a nice seat for the table!
The natural stain made the table feel so warm and the extra coat of protection on top provided a slight sheen that made it feel really elegant and eye catching. The dark metal legs were the perfect material to contrast the natural wood on the top. It gave the piece that industrial edge it needed to compliment the space it was in. The legs looked so sleek, and the clean open lines made it feel edgy without taking away from the most important part of the table, the live edge.
But let’s talk about the coolest part of this piece... the colored epoxy channels!!!!! LIKE WOW! I knew they were going to look awesome and compliment the radiator but it looked SO GOOD beside it. It was the perfect minimal pop on the table that set it apart from all the other live edge tables and it really personalized it for that space. It just gave the piece such personality and conversation without distracting the eye away from the beauty of the live edge. I’m so happy we went with this minimal approach.
This table really was one-of-a-kind.


What a learning curve this project was! Lots of ups and downs. It was a LOT of work but really rewarding at the end.
Let me know what you guys thought of it, and share your thoughts on epoxy. Have you worked with it before? It’s definitely a medium that you get better at over time, that's for sure. Also let me know what kind of epoxy project I should tackle next!
Thanks for watching and I’ll see you guys next time!
WATCH THE FULL VIDEO TUTORIAL AND JOURNEY!
FIND OUT MORE ABOUT FUSION MINERAL PAINT BELOW!
A FEW COOL FACTS ABOUT FUSION PAINT:
APPLICATION:
Follow our directions carefully and Fusion™ can be applied to most previously painted or coated surfaces without priming or significant prep work.
NO TOP COAT?:
Fusion™ is formulated with a built-in top coat, the 100% acrylic resin. You do not need to use a top coat for water permanency!
COVERAGE:
Excellent coverage! Our Fusion™ paint offers incredible coverage of 75 sq ft per Pint(500ml). In most cases one coat is all you need. Our coverage is outstanding!
DURABILITY:
Once Fusion has cured, it yields a highly durable and a washable finish. If you choose, you can of course achieve a beautiful lustre by adding a Beeswax on top, or the Tough Coat Finish. Fusion™ is dry to the touch after 2 hours and can accept a re-coat after 4 hours. Cure time with all acrylic paints is 21 days, however, painted surfaces can be used gently after 24 to 48 hours of drying time.
SHEEN:
Fusion™ is offered in a gorgeous matte finish. This means an almost zero reflectance value that allows you to achieve a beautiful smooth finish.
DISTRESS:
Absolutely! This paint is extremely easy to work with, though we recommend distressing soon after the paint has dried. It is very durable, so achieving the same result is tad more work after it has cured! It is recommended to apply a top coat when you distress because you will break open the surface and a top coat will be necessary to prevent water damage and continued distressing through extensive wear and tear.
* PLEASE NOTE THIS BLOG CONTAINS AFFILIATE LINKS FROM AMAZON US.