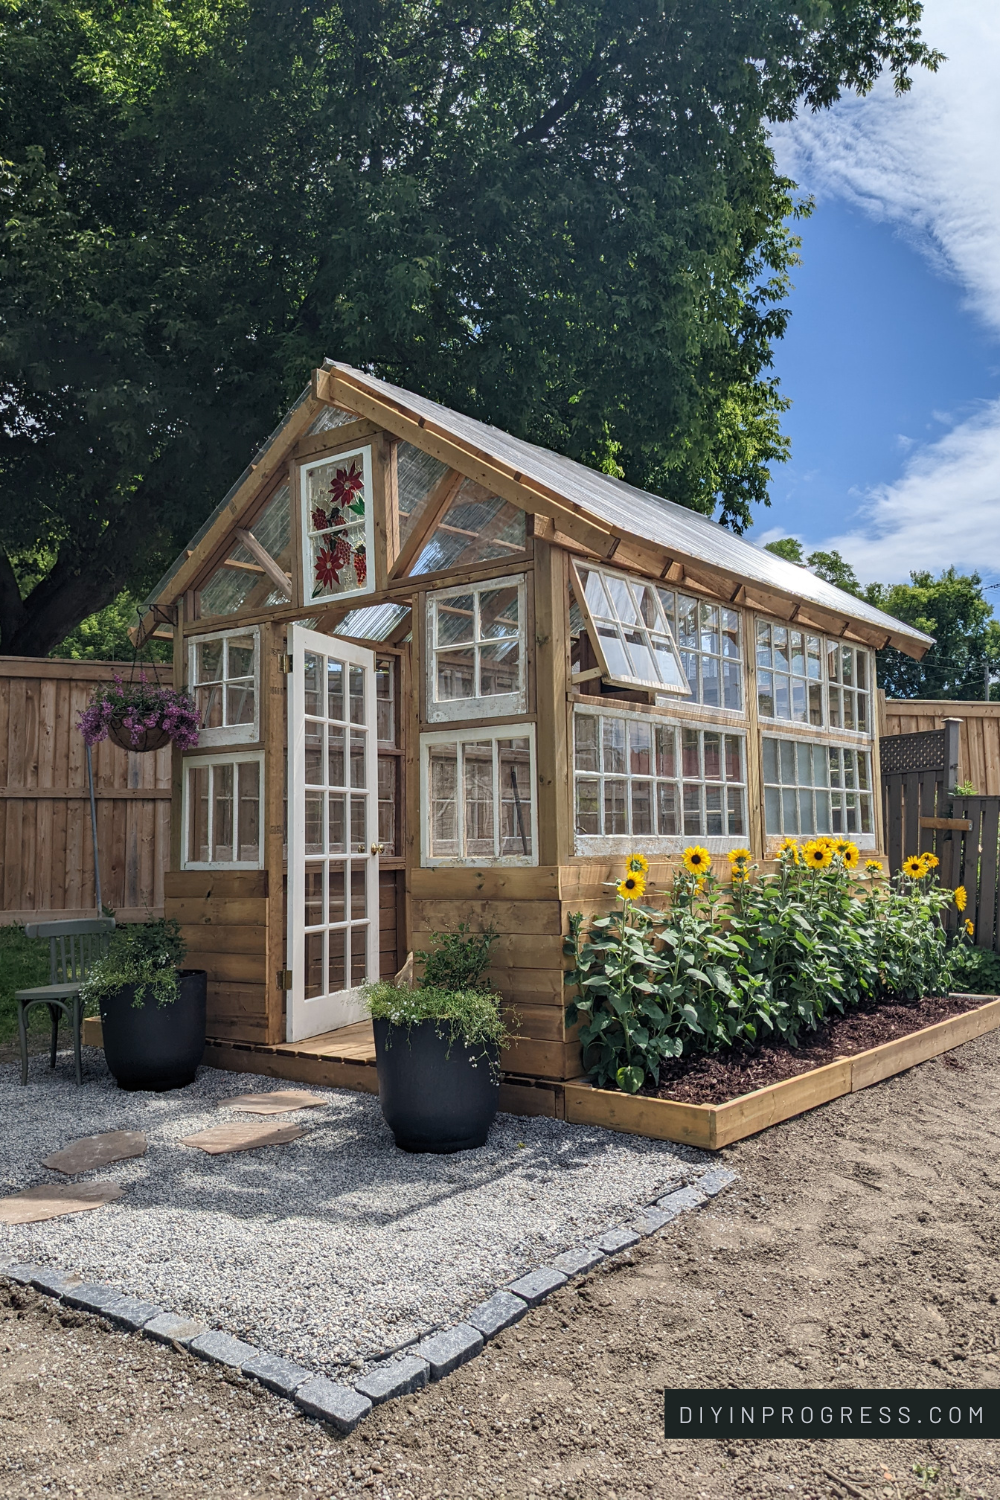
DIY Greenhouse Part 2 - Installing the Antique Windows, the Walls, and the Roof
DIY friends! Welcome back! I’m Danie and today’s DIY In Progress is Part 2 of my greenhouse build. This is a series all about my journey to create a beautiful dream greenhouse in my backyard.
If you recall, at the end of Part 1 we had a whole "tiny home" structure, ready for action!
It was time to prioritize preparing the windows, determining the quantity to install and the precise method for installation!

Can you use old windows to make a greenhouse?
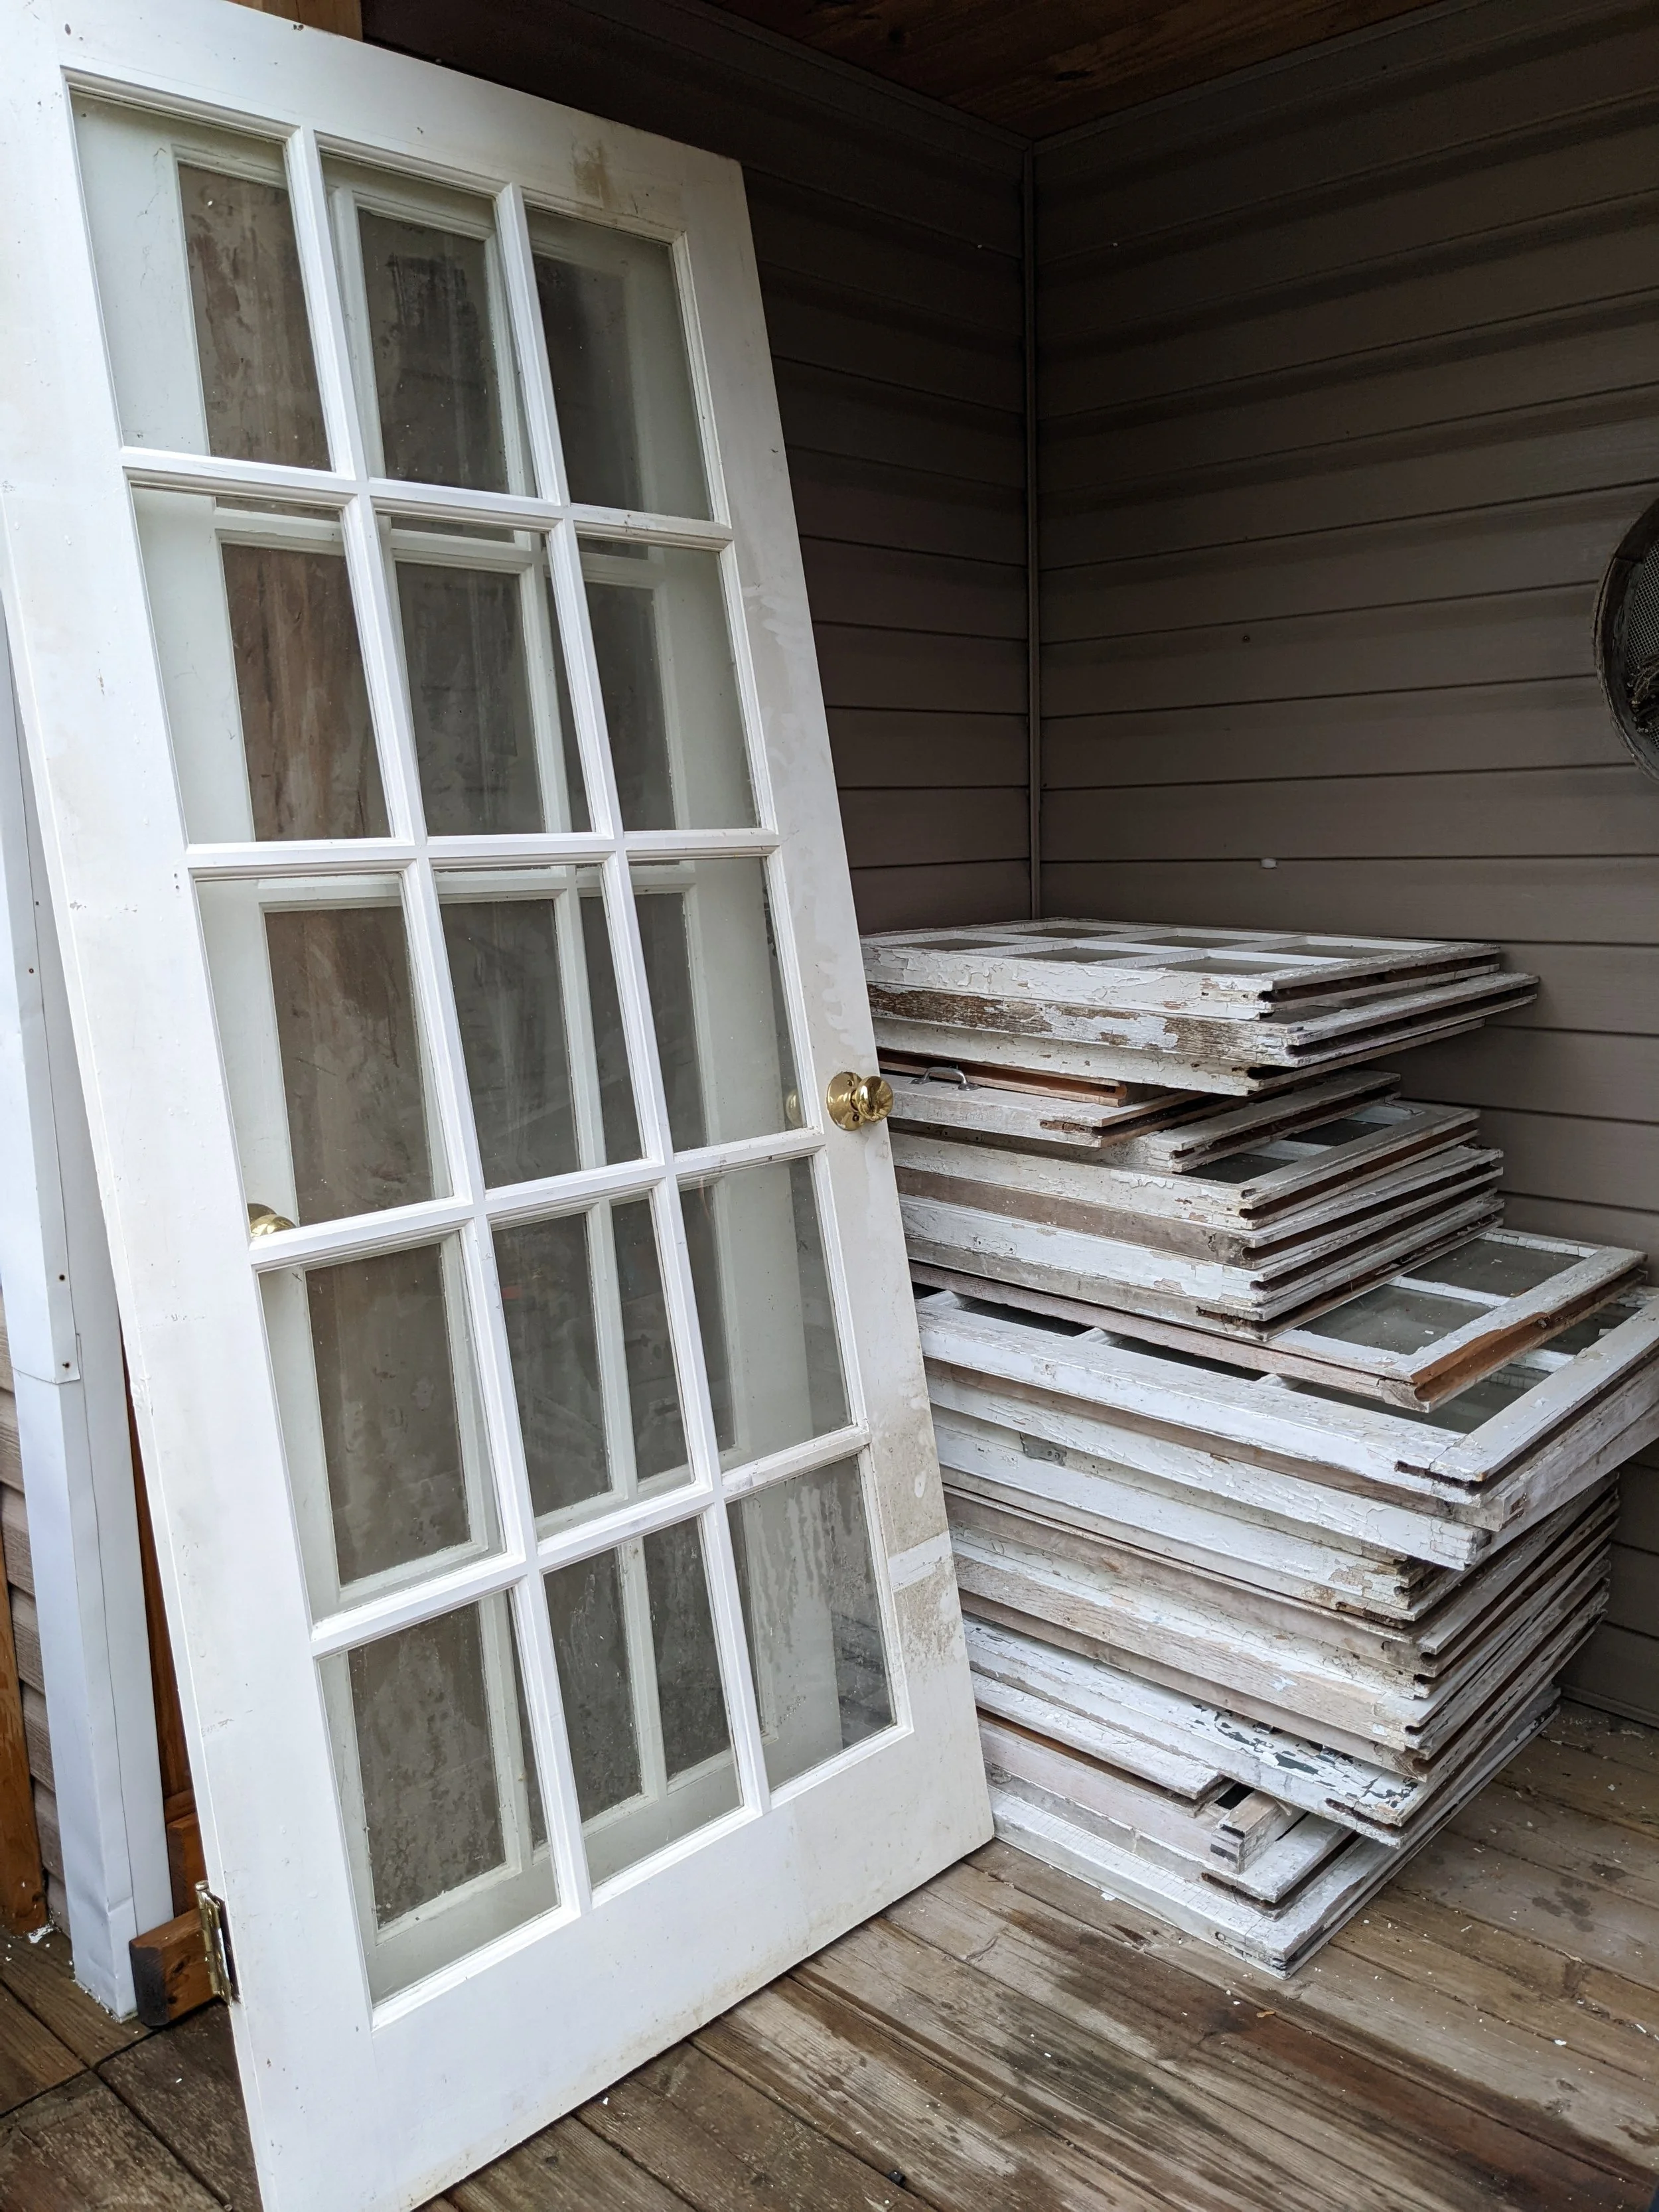
YES, you absolutely can use old windows! Whether someone gifts them to you or you find a great deal on buy-or-sell websites, take advantage of this cost-saving strategy and use any kind of window you can find!
PROCEED WITH CAUTION: sometimes salvaged windows come with a bit of a surprise! I was gifted mine and I wasn't really sure where they had come from or how old they were. I decided it would be a good idea to test for lead paint because I’ve had issues with this in the past. Anything that you think MIGHT be from before 1975-ish (when lead paint was discontinued for regular use) should be tested.

I bought a lead test swab kit on Amazon. Basically, you take the swab out of the jar and put it in water, and then rub it on the paint for thirty seconds. The swab starts out yellow, and if it stays yellow there's no lead. If the swab turns red, you know you are dealing with lead (love the rhyme there!). My fears were accurate and my painted windows DID have traces of lead , so my next steps had to be handled with care. Please check your old windows and be safe, especially if you have young children!

With lead in my windows and heart, this meant I would need to take extra precautions (gloves and a mask) when I stripped the windows to prevent dust or paint chips from becoming airborne and entering my lungs or getting on my skin. Because they were chipping and flaking, stripping was the best option to remove as much of the contaminated paint as possible.
Prepping my salvaged windows and building the exterior walls
Tools:
Scrapper
Track saw guide * Bonus *
Materials:
Lead test kit
1x6x8 PT fence boards
2x4 PT wood
3” Deck Screws
Stripping the lead paint

To strip my windows, I used my favourites stripping agent CITRI STRIP, and then covered each window with plastic wrap before I moved to the next one. This method is safer than scraping because it means less airborne paint chips and less peeling too. The plastic helps the stripper work quicker and penetrate through more layers of paint.
I let the windows sit like this for a while and then I took my stripping tool and stripped off as much of the paint as possible. This process took a bit of time but the stripper did a great job.

Building the Exterior Walls
The next thing I tackled was the wood that wrapped around the bottom half of the greenhouse. By adding this wood feature on the bottom, I was able to cut down on the number of windows I needed to install on the upper half. Using 1x6x8 fence boards, i measured, cut and attached them horizontally to the bottom exterior of the greenhouse. I used two 6’ pieces for the 12’ sides and the front, and 8’ boards for the back. To attach the boards, I used my brad nailer (or use nails and hammer) and placed a nail at each 4x4/2x4 vertical support.

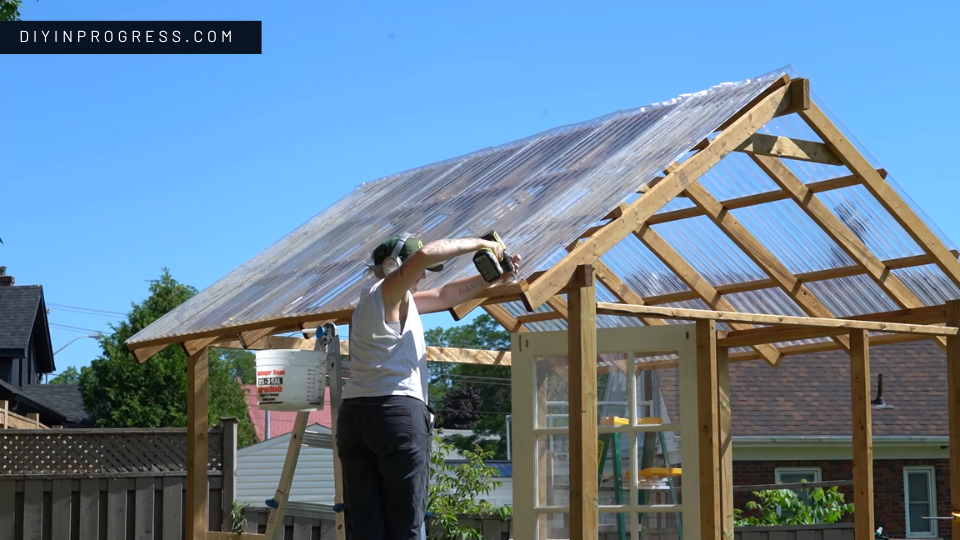
Putting on the roof

I first cut my 12’ corrugated panels in half to match my 6’ rafter length. I used a circular saw equipped with a saw blade designed to cut plexiglass and plastic.
Let’s attach! Each corrugated plastic roof panel was applied on top of the purlins attached to the roof frame. I simply worked one piece at a time, overlapping each panel by one and securing with my 1” hex head screws. The screws came with special rubber pad under the head that are designed to create a tight seal and not break the plastic when they tighten. Once all the panels were on, I added the ridge cap to the top and voila!
(Pro tip: don't leave the plastic panels on the grass in the sun for ANY amount of time. The sun will fry the grass underneath. Don't ask me how I know.)
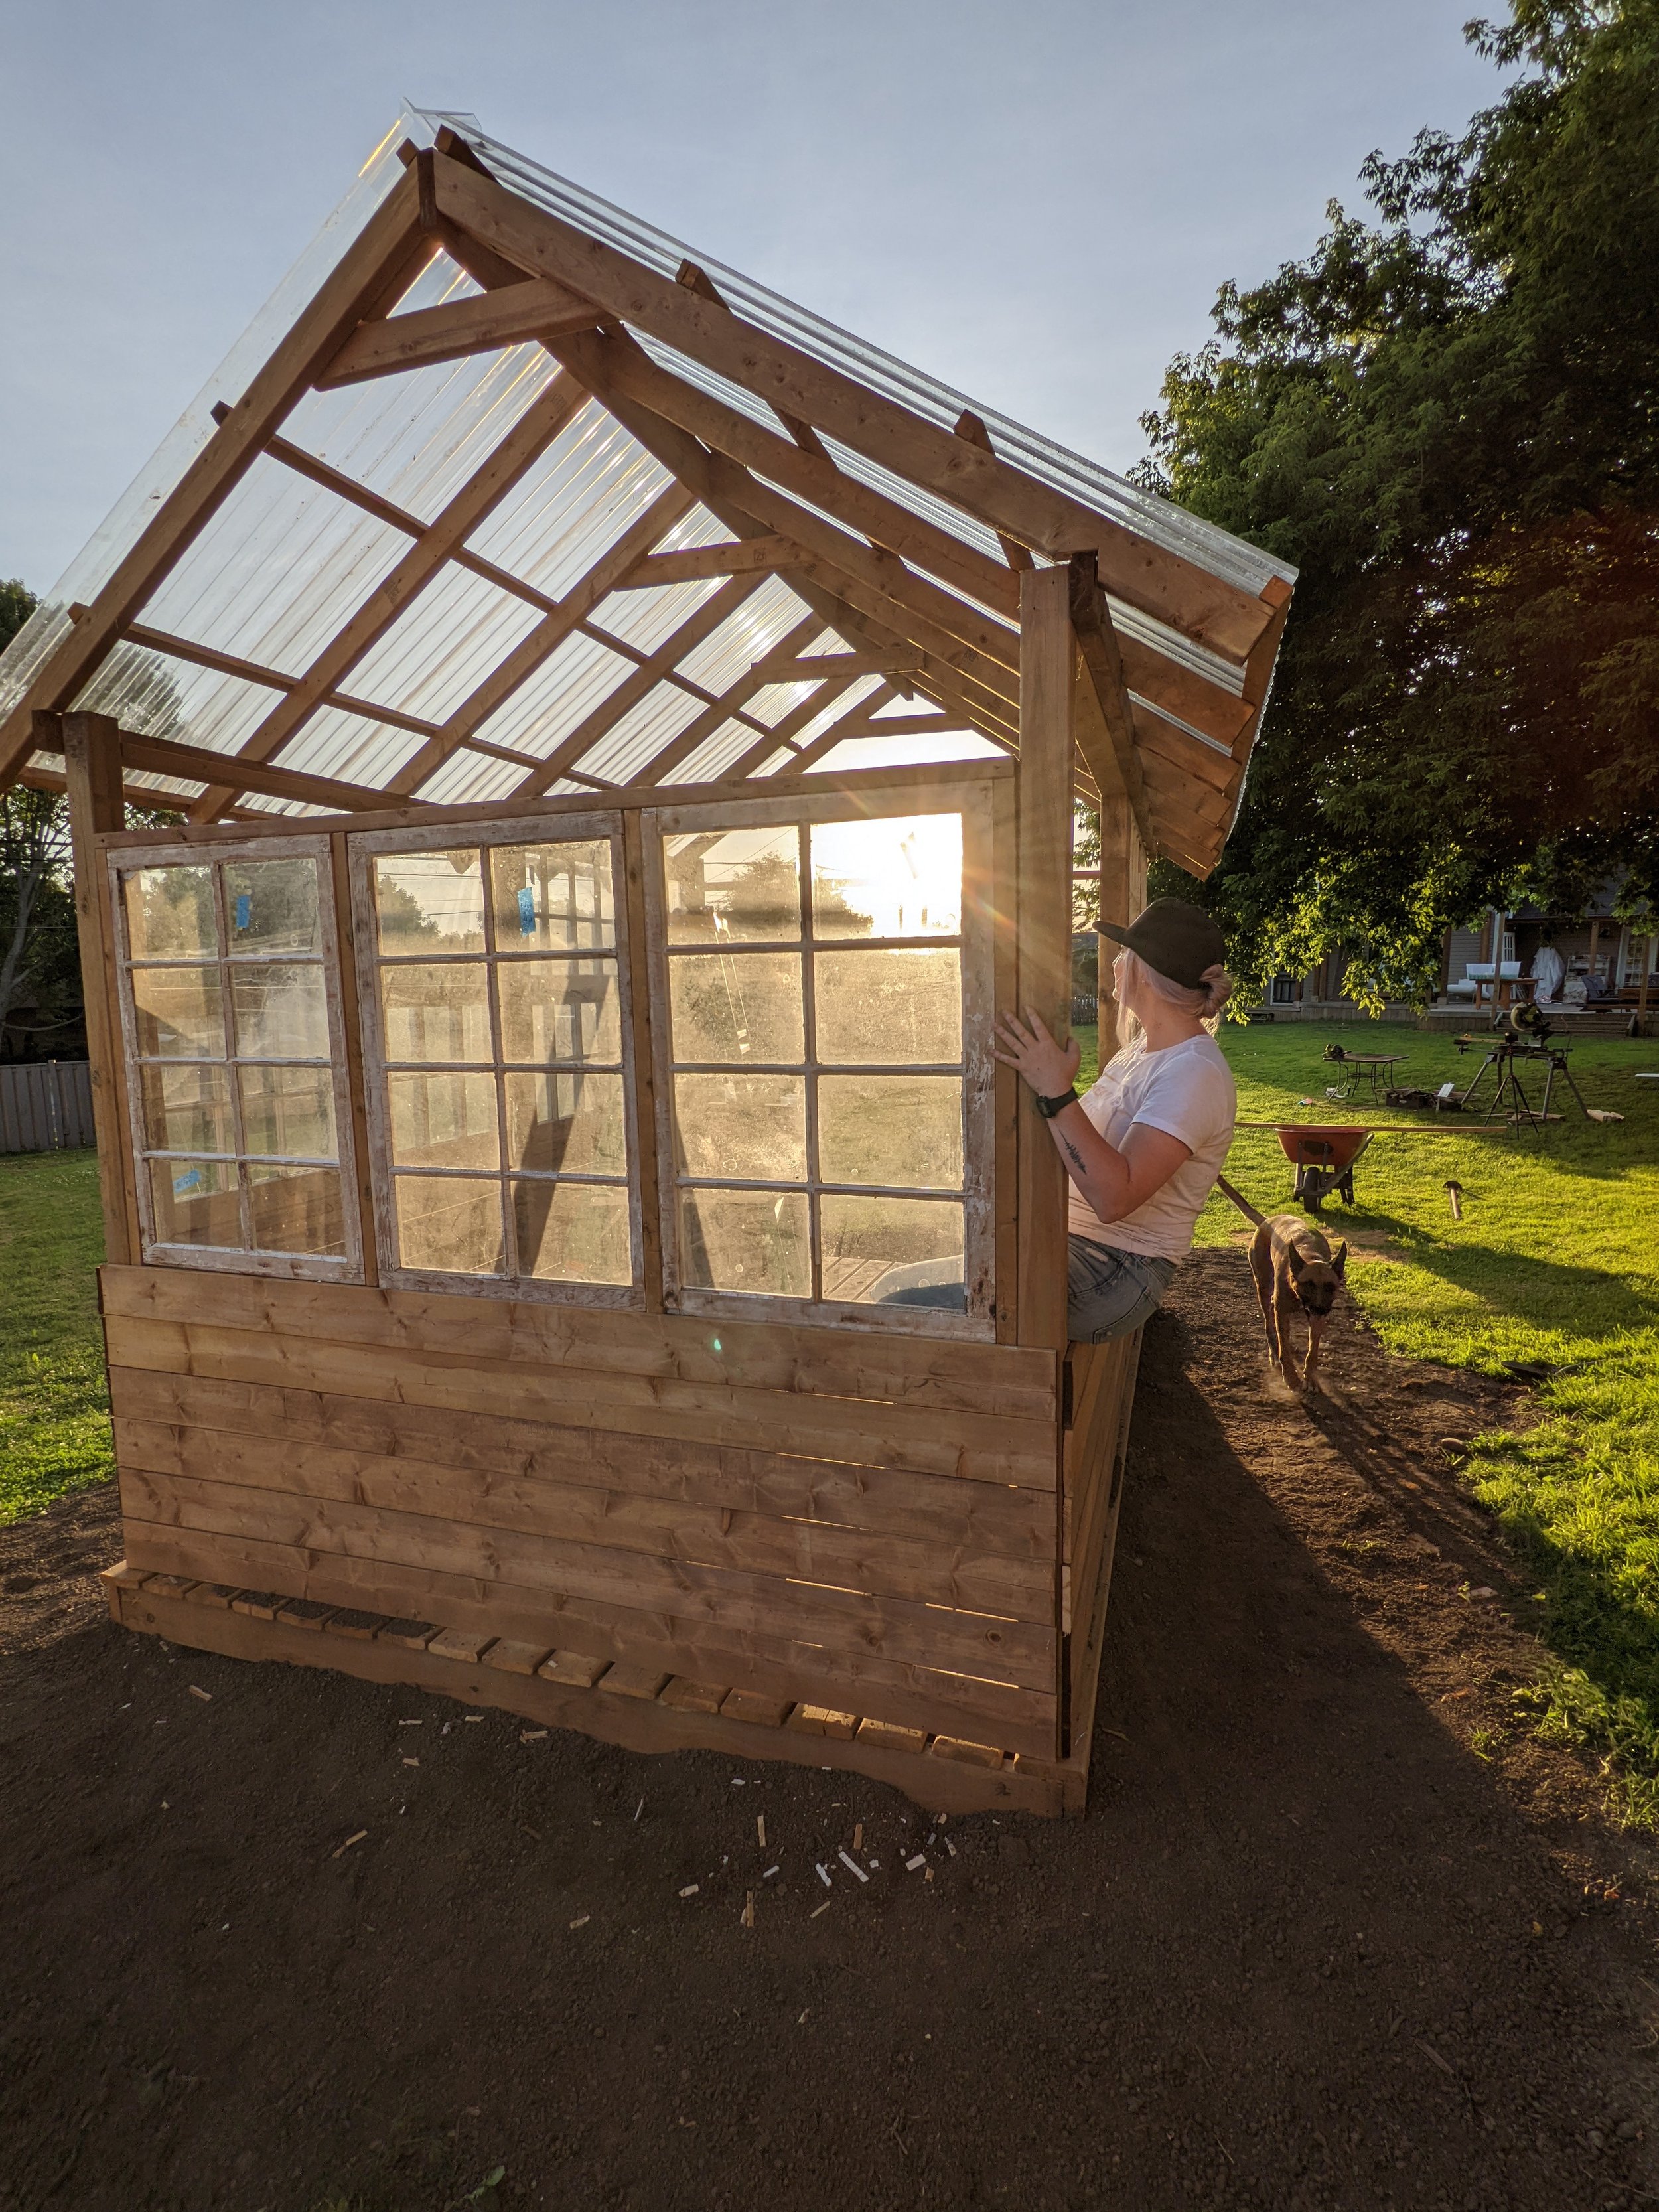
Using old windows for a DIY greenhouse
It was finally window day! I had waited for this moment for a very long time.
I ended up getting a few more windows from my mom to help us make everything fit (the size of the windows wasn't always perfect for the design I wanted). Salvaged windows are special and I'm glad I'm using them, but they definitely cause a bit of a hassle because of their unique shape and sizes. We had to take all the different window heights and lengths into account and figure out which windows would go where.
What kind of windows can you use in a greenhouse?
If you don't have a free source of windows, you will have to look to buy-and-sell websites instead. Do some research and make sure you get the biggest greenhouse bang for your buck. Tempered glass is better than other types of glass. And glass is better than a polycarbonate panel, but this is still an option you could look into if you can't find glass alternatives. Vinyl frames are probably the least expensive if you are purchasing new windows.
"Free" was more important to me than any other factor, so I didn't worry too much about the type of glass or frame that my windows had. Decide what factor is most important to you (mine was cost!) and do what works best.
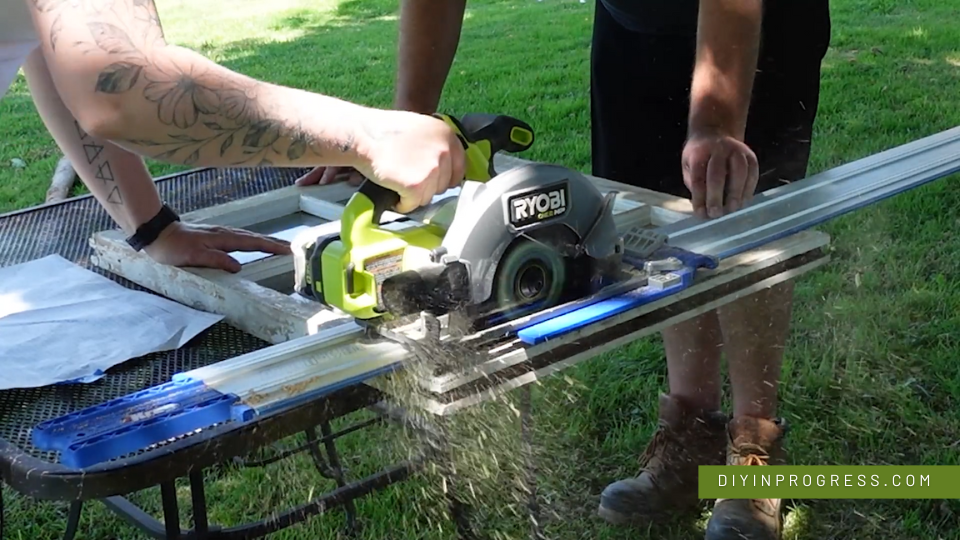
Geoff helped me with installation because this was certainly a two-person job! We used 2x4 pressure treated lumber to build a wood frame around each window. The frames were there to help attach the window to the greenhouse but also to make up sizing issues. Some windows needed to be trimmed, and other needed to be shimmed to help fit. It’s a bit like playing a game of tetris! When it comes to the window design, there is no wrong way to dit it. The 4x4 post framing design ensures there are no load requirements between the posts. Frame the windows in the best way they fit!
To make any trims, I simply used my circular saw with a track guide. This ensured straight cuts every time!

How to ensure proper airflow
Air circulation is so important in a greenhouse! Without a vent window, roof vents, or some other way for air to circulate, your greenhouse will just fry your new plants. I wanted to make sure there were at least two windows that could open. We added hinges to two smaller top windows that would allow me to pop it open. We also purchased a solar powered vent to constantly move air in the greenhouse, no electricity or human presence needed. This will be installed on the back wall.

My potato tub dream come true
When Geoff and I talked about growing potatoes in our greenhouse, I wanted to do it in a really fun and unique way. I saw so many pictures of other greenhouses that use bathtubs for this, and I wanted one too! I am so excited to tell you that I was gifted a beautiful, clawfoot steel tub that was destined for the scrap yard if I didn't take it. It had a dark green base and lovely brass fittings - it was a dream come true! I decided that the back wall of the greenhouse will be a great place for it to live, once everything is done.

And that's it for Part 2 of our beautiful greenhouse build!