
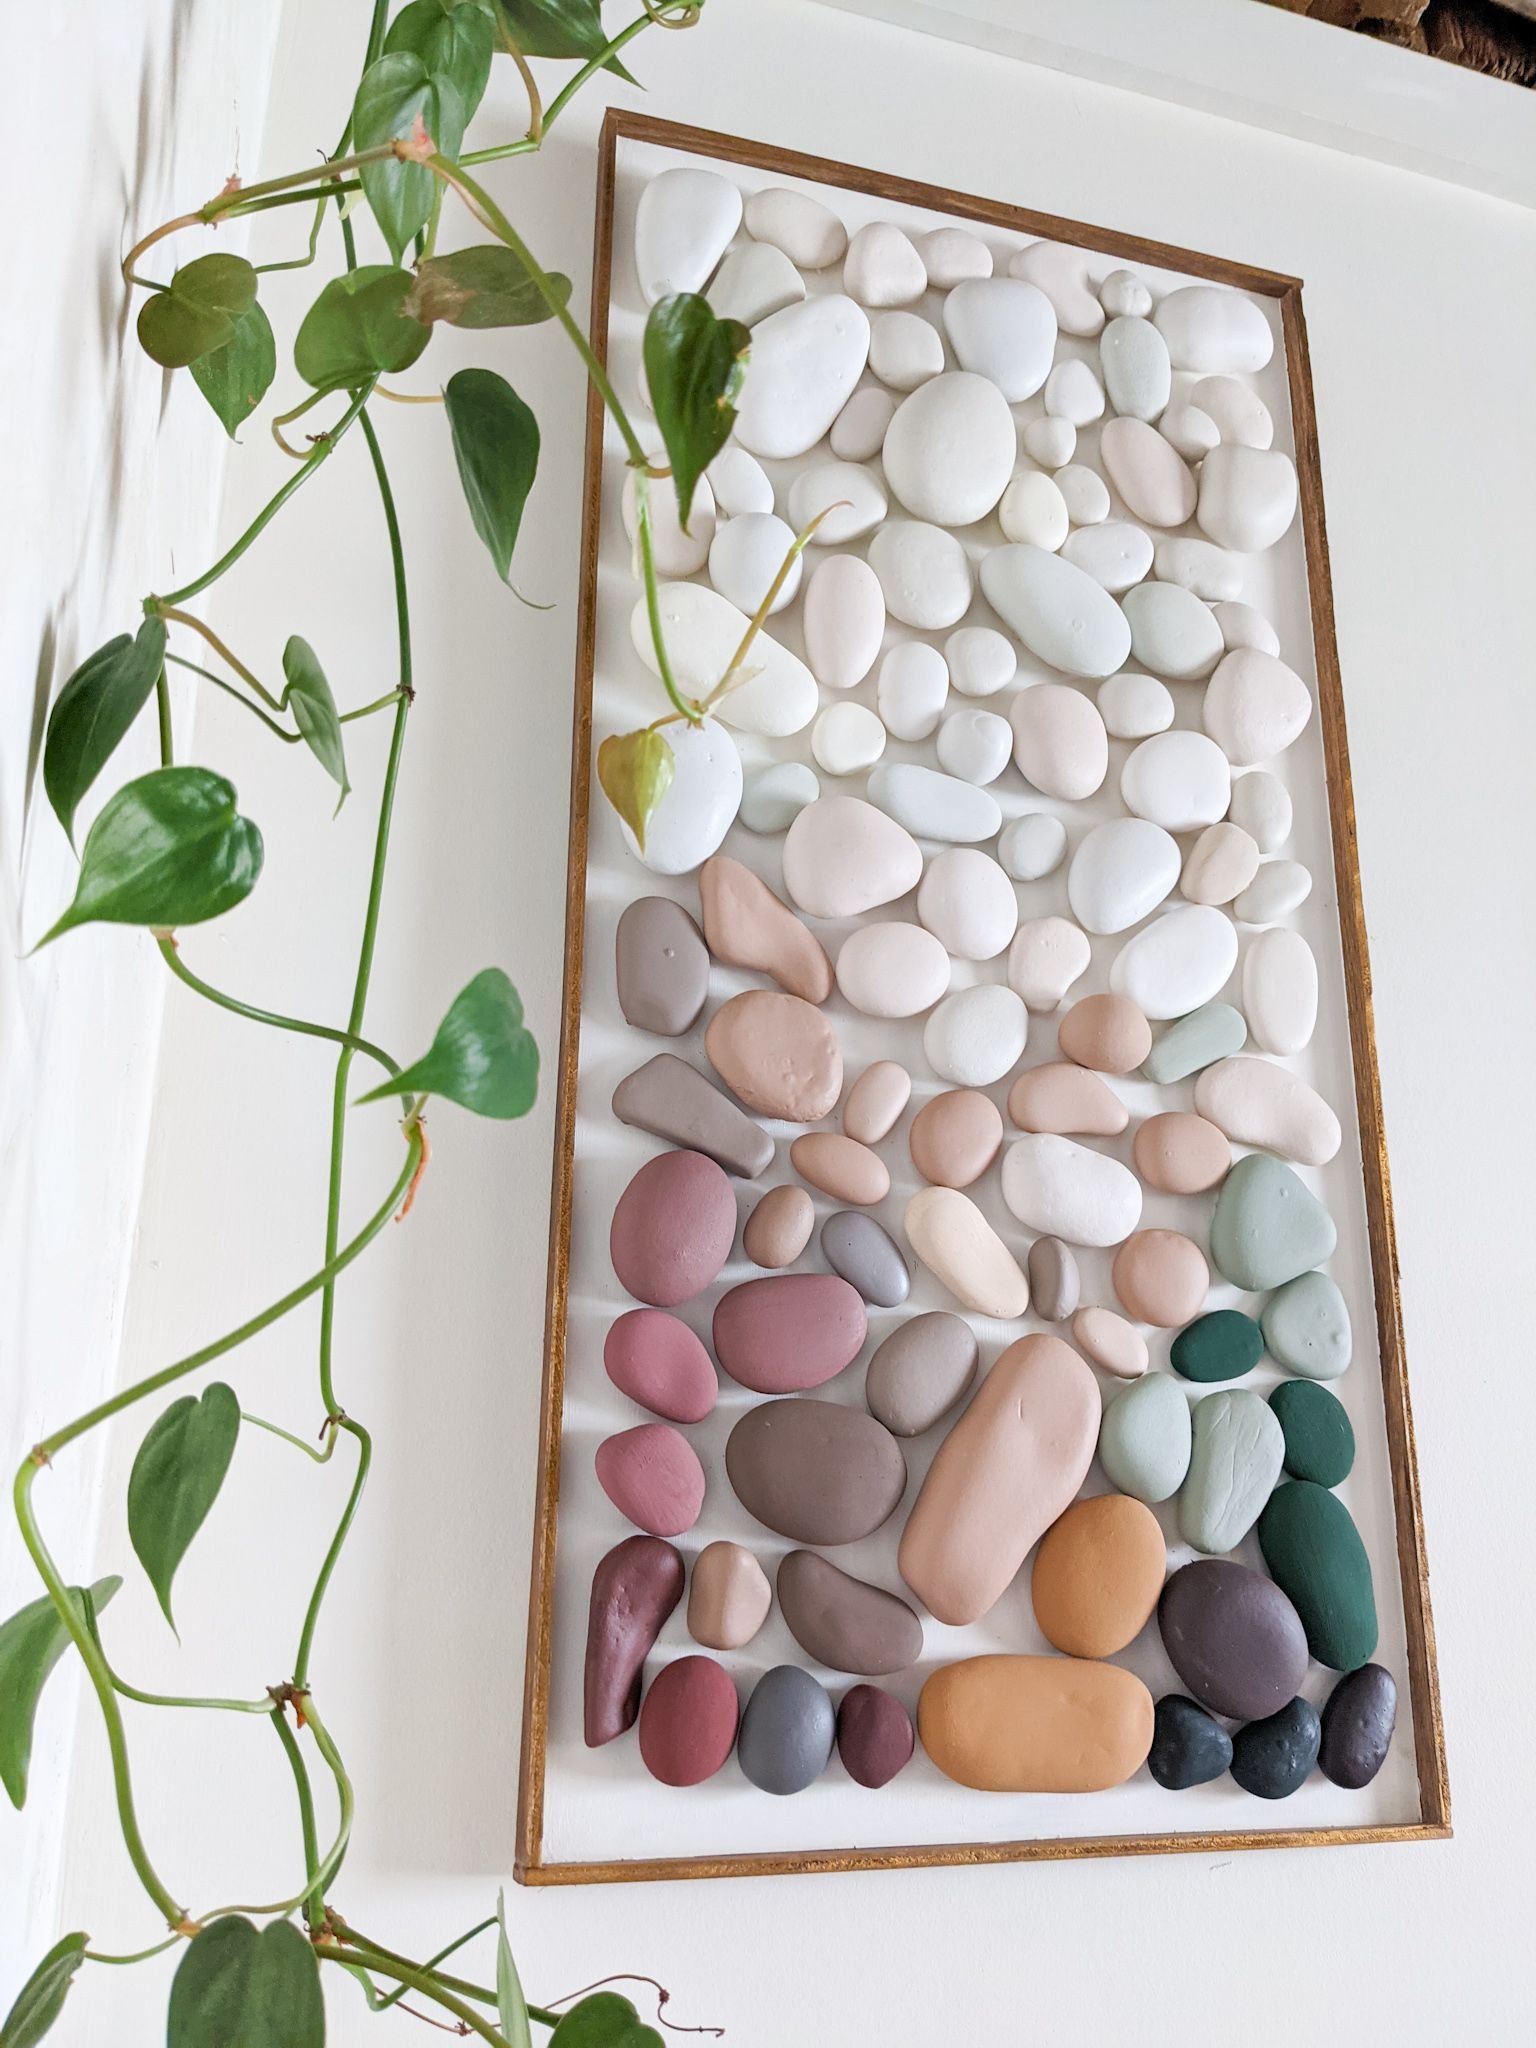
Contemporary 3D ROCK Art
If you’re looking for a unique way to combine nature, art and diy into your home - this DIY Rock Art is a simple way to achieve that! An art piece like this feels like an elevated childhood classic and it’s so simple to make. Step by Step below!
WATCH THE FULL DIY DIARY HERE ->
STEPS:
Step 1 - Find desired rocks - for this look, you will need to source several river rocks or anything that has a smooth finish.
Step 2 - Wash your rocks with water and soap.
Step 3 - Determine the frame size of your art piece and tape off a mock square on a table for perspective. Use this taped section to roughly map out how many rocks you will need and where you would like to place them.
Step 4 - Once you know which rocks you will be using, it’s time to paint! For me, this was a complete experiment - I was originally going to paint the rocks with a brush but after a few test rocks, I didn’t like that you could see the brush strokes. I wanted the rocks to be appear smooth, so I went with a dipping method using regular house paint colours and used small tongs to dip each rock into their desired colours. This route is a bit messy but was worth it to see the end result. Feel free to test different painted methods and use what works best for you!
Step 5 - Let’s build a frame! For mine, I needed to make sure it was strong enough to carry 50+ rocks! So I used 1/2” plywood for the base and 1/4” x 1” plywood pieces for the frames. I painted the back white and stained the frame. Depending on your frame size, you could adjust the materials used.
Step 6 - Secure the rocks! To securing the rocks, I used LePage No Nail construction adhesive. This takes about 24 hours to set but I can assure you will be strong enough to hold your rocks in place.
Step 7 - Hang your art. I added two eye hooks in the back and used a strong picture hanging wire that could hold up to 100 lbs.
Enjoy!